HP Cc3310 Installation Instructions: HP Universal Rack Mount Kit - HP Carrier- - Page 14
Installing the Outer Rails
 |
View all HP Cc3310 manuals
Add to My Manuals
Save this manual to your list of manuals |
Page 14 highlights
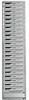
HP Universal Rack Mount Kit (with Stop Feature) for 19-23 in. 2- and 4-Post Racks Installation Instructions 4. Install the two outer rail subassemblies in the rack using twelve 10-32x1/2" SEMS screws or other appropriate fasteners. If bar-nuts are used, they should be installed such that all threads are aligned vertically, ensuring the center hole is not skewed with respect to the holes on the rack rail. NOTE If mounting a 1U system in a 1U confined space, four 2U bar-nuts are included to replace the 1U bar-nuts. The 2U bar-nuts need to be installed in the 1U space either above or below the 1U space where this kit is being mounted. When installing multiple 1U systems, the 2U barnuts should be used in the next to last kit. NOTE L-Brackets should be adjusted front-to-back to fit rack channel depth. Figure 1-14. Installing the Outer Rails 14
-
 1
1 -
2
-
3
-
4
-
5
-
6
-
7
-
8
-
 9
9 -
 10
10 -
 11
11 -
 12
12 -
 13
13 -
 14
14 -
 15
15 -
 16
16
 |
 |
