HP Chromebook 11-2200 Maintenance and Service Guide - Page 40
IMPORTANT, These screws have specific properties that ensure the proper operation of the computer.
 |
View all HP Chromebook 11-2200 manuals
Add to My Manuals
Save this manual to your list of manuals |
Page 40 highlights
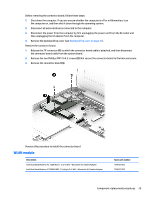
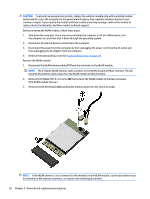
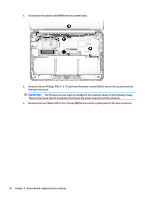
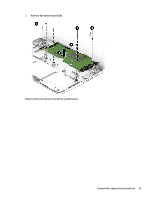
4. Disconnect the speaker cable (4) from the system board. 5. Remove the two Philllips PM2.5×3.7 broad head firmware screws (1) that secure the system board to the base enclosure. IMPORTANT: The firmware screws must be installed in the locations shown in the following image. These screws have specific properties that ensure the proper operation of the computer. 6. Remove the four Philllips PM1.9×4.2 screws (2) that secure the system board to the base enclosure. 34 Chapter 5 Removal and replacement procedures
-
 1
1 -
2
-
3
-
4
-
5
-
6
-
7
-
8
-
9
-
10
-
11
-
12
-
13
-
14
-
15
-
16
-
17
-
18
-
19
-
20
-
21
-
22
-
23
-
24
-
25
-
26
-
27
-
28
-
29
-
30
-
31
-
32
-
33
-
34
-
 35
35 -
 36
36 -
 37
37 -
 38
38 -
 39
39 -
 40
40 -
 41
41 -
 42
42 -
 43
43 -
 44
44 -
 45
45 -
46
-
47
-
48
-
49
-
50
-
51
-
52
-
53
-
54
-
55
-
56
-
57
 |
 |
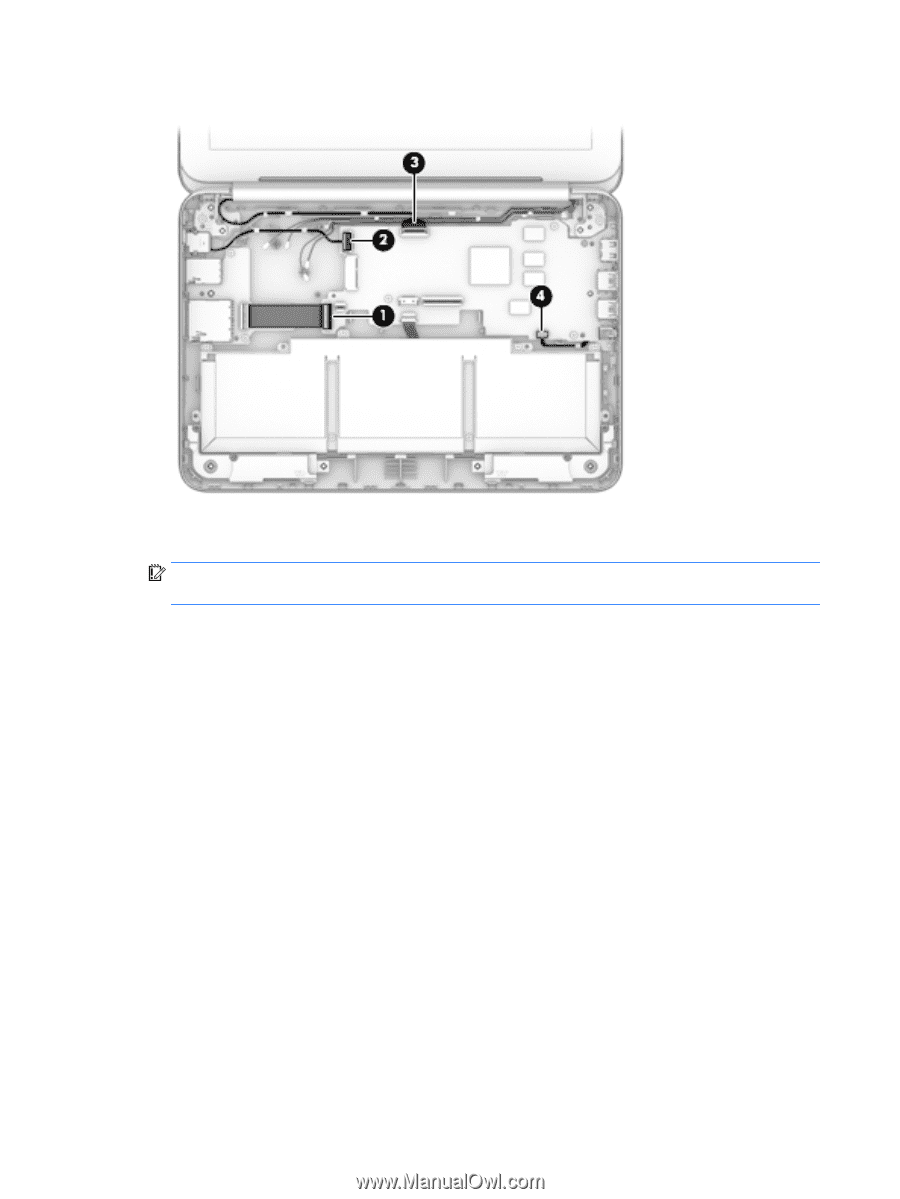
4.
Disconnect the speaker cable
(4)
from the system board.
5.
Remove the two Philllips PM2.5×3.7 broad head firmware screws
(1)
that secure the system board to
the base enclosure.
IMPORTANT:
The firmware screws must be installed in the locations shown in the following image.
These screws have specific properties that ensure the proper operation of the computer.
6.
Remove the four Philllips PM1.9×4.2 screws
(2)
that secure the system board to the base enclosure.
34
Chapter 5
Removal and replacement procedures