HP Chromebook 13 G1 Maintenance and Service Guide - Page 39
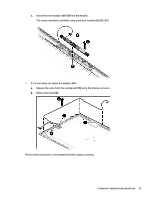
Remove the two Phillips screws from the left and right outer caps
 |
View all HP Chromebook 13 G1 manuals
Add to My Manuals
Save this manual to your list of manuals |
Page 39 highlights
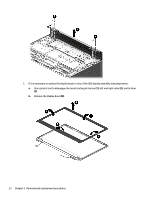
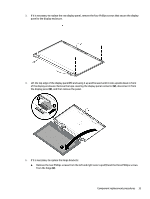
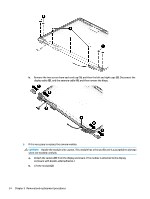
3. If it is necessary to replace the raw display panel, remove the four Phillips screws that secure the display panel to the display enclosure. 4. Lift the top edge of the display panel (1) and swing it up and forward until it rests upside down in front of the display enclosure. Remove the tape covering the display panel connector (2), disconnect it from the display panel (3), and then remove the panel. 5. If it is necessary to replace the hinge brackets: a. Remove the two Phillips screws from the left and right outer caps (1) and the three Phillips screws from the hinge (2). Component replacement procedures 33
-
 1
1 -
2
-
3
-
4
-
5
-
6
-
7
-
8
-
9
-
10
-
11
-
12
-
13
-
14
-
15
-
16
-
17
-
18
-
19
-
20
-
21
-
22
-
23
-
24
-
25
-
26
-
27
-
28
-
29
-
30
-
31
-
32
-
33
-
 34
34 -
 35
35 -
 36
36 -
 37
37 -
 38
38 -
 39
39 -
 40
40 -
 41
41 -
 42
42 -
 43
43 -
 44
44 -
45
-
46
-
47
-
48
 |
 |
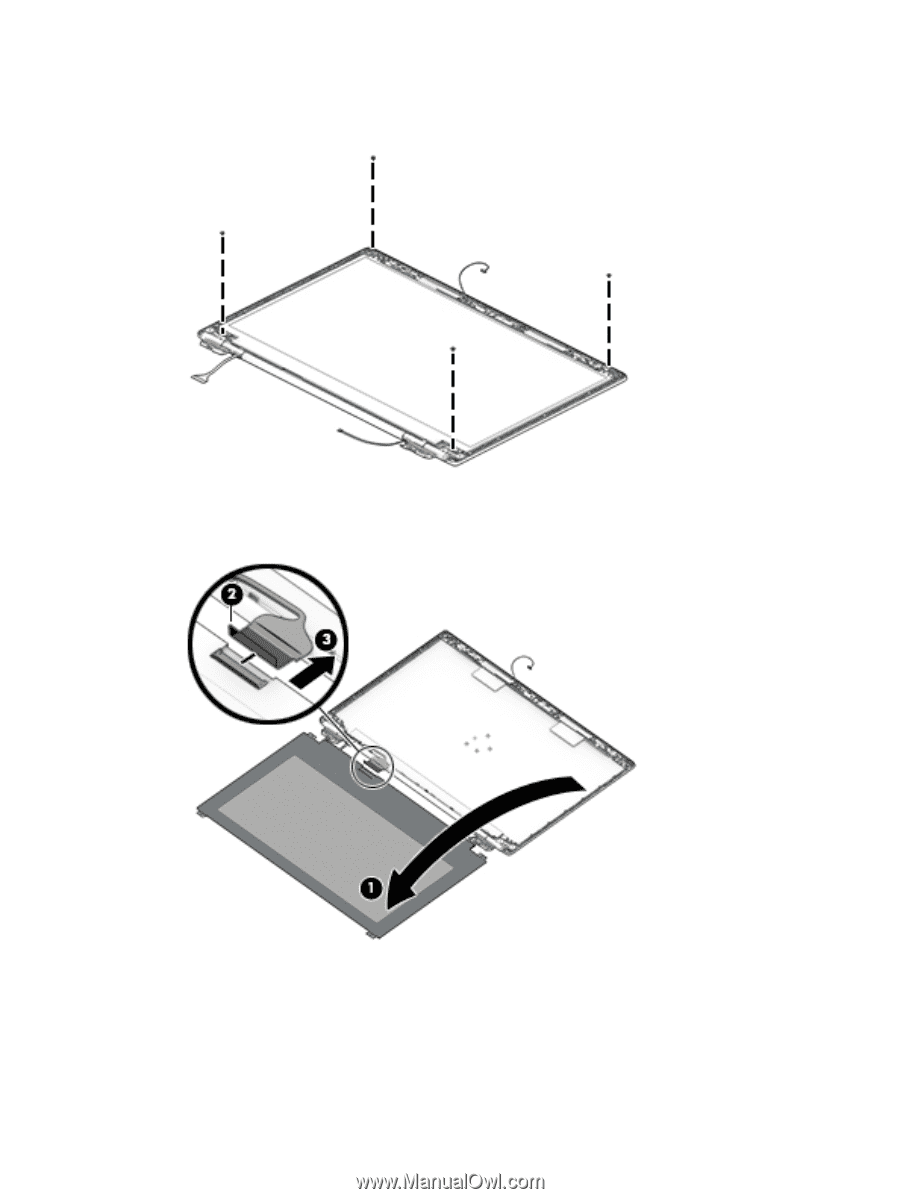
3.
If it is necessary to replace the raw display panel, remove the four Phillips screws that secure the display
panel to the display enclosure.
4.
Lift the top edge of the display panel
(1)
and swing it up and forward until it rests upside down in front
of the display enclosure. Remove the tape covering the display panel connector
(2)
, disconnect it from
the display panel
(3)
, and then remove the panel.
5.
If it is necessary to replace the hinge brackets:
a.
Remove the two Phillips screws from the left and right outer caps
(1)
and the three Phillips screws
from the hinge
(2)
.
Component replacement procedures
33