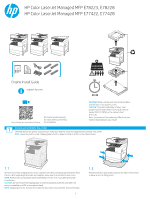
HP Color LaserJet Managed MFP E78223-E78228 Engine Install Guide - Page 4
Install the toner collection unit TCU., Load paper in Tray 2., Initialize the printer.
 |
View all HP Color LaserJet Managed MFP E78223-E78228 manuals
Add to My Manuals
Save this manual to your list of manuals |
Page 4 highlights
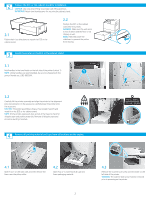
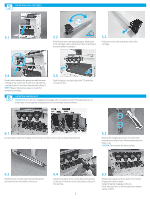
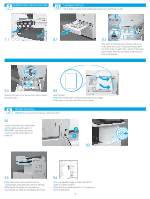
7 Install the toner collection unit (TCU). 8 Load paper in Tray 2. NOTE: Paper is used to print configuration sheets as needed (Letter or A4). 7.1 8.1 8.2 Push down on the blue tab in the back of the tray. At the same time, pinch or squeeze the blue tab in the front of the tray and slide to adjust to the proper paper length. Both tabs are spring-loaded and will lock, once released. 8.3 Squeeze the sides of the tab, and then slide to adjust the paper width. 8.4 Load the paper. NOTE: A4 or Letter paper should be loaded with the long edge of the paper on the right side of the tray, as shown. 9 Initialize the printer. CAUTION: Do not connect the network cable at this time. 9.1 Connect the power cord to the printer and the wall receptacle (callout 1). IMPORTANT: Use the printer power switch to turn the printer power on (callout 2). 2 1 9.2 9.3 Follow the control panel prompts to set the country/region, language, date, and time settings. NOTE: Wait 5-10 minutes for the printer to automatically complete the initialization processes. 9.4 Print a configuration page to make sure that the printer is properly working. NOTE: Mark the printed page with a "1" to represent the first initialization. 4
-
 1
1 -
 2
2 -
 3
3 -
 4
4 -
 5
5 -
 6
6 -
 7
7
 |
 |
