HP Dc5000 Troubleshooting Guide - Page 7
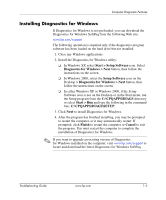
Installing Diagnostics for Windows, Diagnostics for Windows > Next
 |
UPC - 829160313740
View all HP Dc5000 manuals
Add to My Manuals
Save this manual to your list of manuals |
Page 7 highlights
Computer Diagnostic Features Installing Diagnostics for Windows If Diagnostics for Windows is not preloaded, you can download the Diagnostics for Windows SoftPaq from the following Web site: www.hp.com/support The following operation is required only if the diagnostics program software has been loaded on the hard drive but not installed. 1. Close any Windows applications. 2. Install the Diagnostics for Windows utility: ❏ In Windows XP, select Start > Setup Software icon. Select Diagnostics for Windows > Next button, then follow the instructions on the screen. ❏ In Windows 2000, select the Setup Software icon on the Desktop > Diagnostics for Windows > Next button, then follow the instructions on the screen. ❏ In either Windows XP or Windows 2000, if the Setup Software icon is not on the Desktop or in the Start menu, run the Setup program from the C:\CPQAPPS\DIAGS directory or select Start > Run and type the following in the command line: C:\CPQAPPS\DIAGS\SETUP. 3. Click Next to install Diagnostics for Windows. 4. After the program has finished installing, you may be prompted to restart the computer, or it may automatically restart. If prompted, click Finish to restart the computer or Cancel to exit the program. You must restart the computer to complete the installation of Diagnostics for Windows. ✎ If you want to upgrade an existing version of Diagnostics for Windows installed on the computer, visit www.hp.com/support to locate and download the latest Diagnostics for Windows SoftPaq. Troubleshooting Guide www.hp.com 1-3
-
 1
1 -
 2
2 -
 3
3 -
 4
4 -
 5
5 -
 6
6 -
 7
7 -
 8
8 -
 9
9 -
 10
10 -
 11
11 -
 12
12 -
13
-
14
-
15
-
16
-
17
-
18
-
19
-
20
-
21
-
22
-
23
-
24
-
25
-
26
-
27
-
28
-
29
-
30
-
31
-
32
-
33
-
34
-
35
-
36
-
37
-
38
-
39
-
40
-
41
-
42
-
43
-
44
-
45
-
46
-
47
-
48
-
49
-
50
-
51
-
52
-
53
-
54
-
55
-
56
-
57
-
58
-
59
-
60
-
61
-
62
-
63
-
64
-
65
-
66
-
67
-
68
-
69
-
70
-
71
-
72
-
73
-
74
-
75
-
76
-
77
-
78
-
79
-
80
-
81
-
82
-
83
-
84
-
85
 |
 |
