HP Deskjet 3050A User Guide - Page 28
Tips for copy success, Tips for scan success - windows 8
 |
View all HP Deskjet 3050A manuals
Add to My Manuals
Save this manual to your list of manuals |
Page 28 highlights
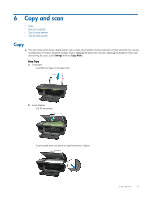
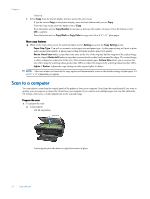
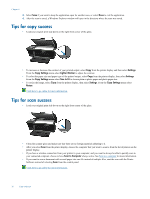
Chapter 6 3. Select Save if you want to keep the application open for another scan, or select Done to exit the application. 4. After the scan is saved, a Windows Explorer window will open in the directory where the scan was saved. Tips for copy success • Load your original print side down on the right front corner of the glass. • To increase or decrease the contrast of your printed output, select Copy from the printer display and then select Settings. From the Copy Settings menu select Lighter/Darker to adjust the contrast. • To select the paper size and paper type of the printed output, select Copy from the printer display, then select Settings. From the Copy Settings menu select Size to Fit to choose plain or photo paper and photo paper size. • To resize the image, select Copy from the printer display, then select Settings. From the Copy Settings menu select Resize. Click here to go online for more information. Tips for scan success • Load your original print side down on the right front corner of the glass. • Clean the scanner glass and make sure that there are no foreign materials adhering to it. • After you select Scan from the printer display, choose the computer that you want to scan to from the list of printers on the printer display. • If you have a wireless connection from your printer to your computer, and you want to always be able to quickly scan to your connected computer, choose to have Scan to Computer always active. See Scan to a computer for more information. • If you want to scan a document with several pages into one file instead of multiple files, start the scan with the Printer Software instead of selecting Scan from the control panel. Click here to go online for more information. 26 Copy and scan
-
 1
1 -
2
-
3
-
4
-
5
-
6
-
7
-
8
-
9
-
10
-
11
-
12
-
13
-
14
-
15
-
16
-
17
-
18
-
19
-
20
-
21
-
22
-
 23
23 -
 24
24 -
 25
25 -
 26
26 -
 27
27 -
 28
28 -
 29
29 -
 30
30 -
 31
31 -
 32
32 -
 33
33 -
34
-
35
-
36
-
37
-
38
-
39
-
40
-
41
-
42
-
43
-
44
-
45
-
46
-
47
-
48
-
49
-
50
-
51
-
52
-
53
-
54
-
55
-
56
-
57
-
58
 |
 |
