HP Deskjet 320 Solutions Guide - Page 132
Printer Self-Test
 |
View all HP Deskjet 320 manuals
Add to My Manuals
Save this manual to your list of manuals |
Page 132 highlights
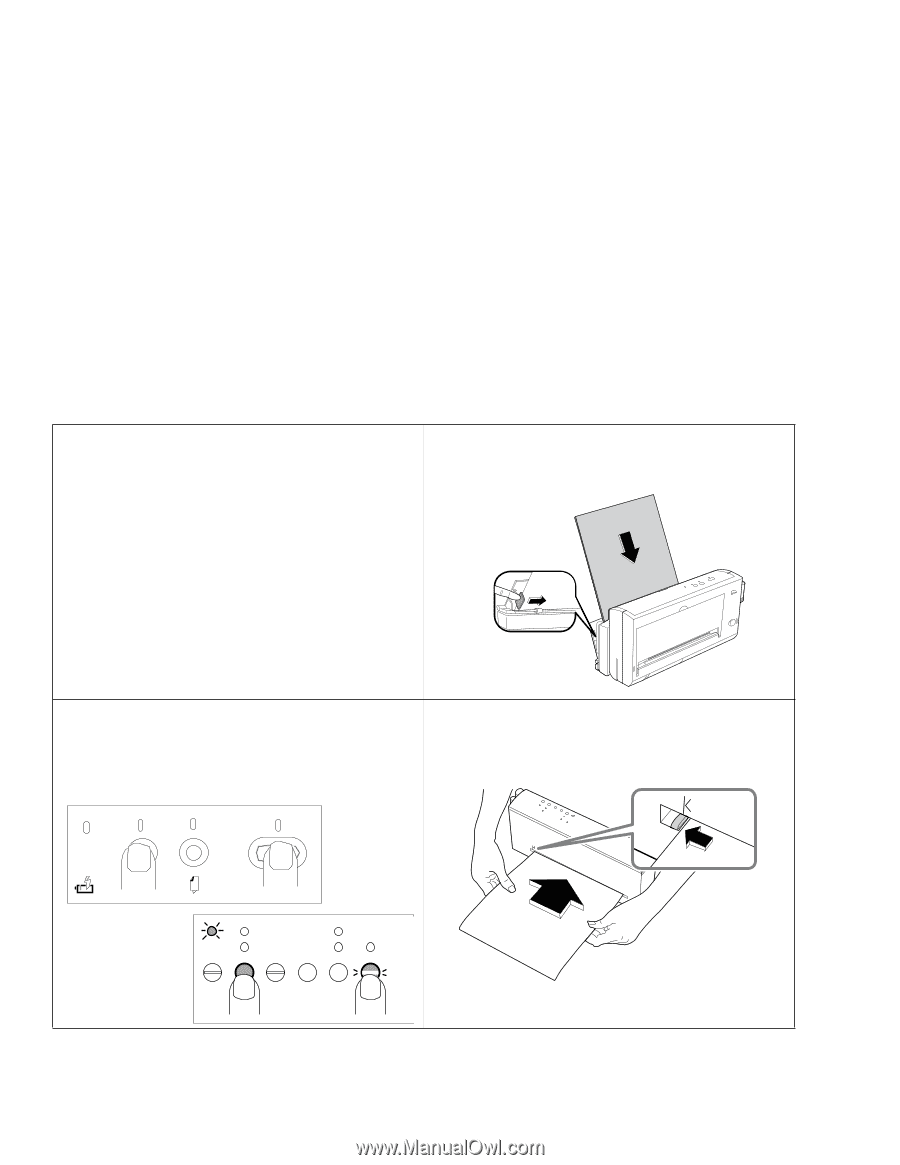
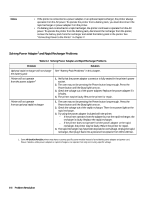
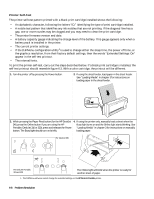
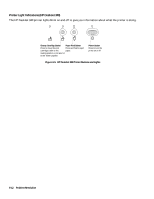
Printer Self-Test The printer self-test pattern printed with a black print cartridge installed shows the following: • An alphabetic character, following the letters "ID," identifying the type of print cartridge installed. • A nozzle test pattern that identifies any ink nozzles that are not printing. If the diagonal line has a gap, one or more nozzles may be clogged and you may need to clean the print cartridge. • The printer firmware version and date. • A battery capacity gauge indicating the charge level of the battery. This gauge appears only when a battery pack is installed in the printer. • The current printer settings. • If the DJPMenu configuration utility1 is used to change either the sleep time, the power off time, or the graphics resolution, from their factory default settings, then the words "Extended Settings: On" appear in the self-test printout. • The internal fonts. To print the printer self-test, carry out the steps described below. If a black print cartridge is installed, the self-test printout should resemble figure 6-3. With a color cartridge, the printout will be different. 1. Turn the printer off by pressing the Power button. 2. If using the sheet feeder, load paper in the sheet feeder. See "Loading Media" in chapter 3 for instructions on loading paper in the sheet feeder. 3. While pressing the Paper Feed button (for the HP DeskJet 4. If using the printer only, manually load a sheet when the 340, press the Online button if you are using the HP Busy light turns on and the Online light starts blinking. See Portable, DeskJet 310 or 320), press and release the Power "Loading Media" in chapter 3 for instructions on manually button. The Busy light should turn on briefly. loading paper. For DeskJet 340 DJP909 For DeskJet Portable, 310 and 320 The Online light will blink when the printer is ready for another sheet of paper. 1. The DJPMenu software cannot change the extended settings on the HP DeskJet Portable printer. 6-8 Problem Resolution
-
 1
1 -
2
-
3
-
4
-
5
-
6
-
7
-
8
-
9
-
10
-
11
-
12
-
13
-
14
-
15
-
16
-
17
-
18
-
19
-
20
-
21
-
22
-
23
-
24
-
25
-
26
-
27
-
28
-
29
-
30
-
31
-
32
-
33
-
34
-
35
-
36
-
37
-
38
-
39
-
40
-
41
-
42
-
43
-
44
-
45
-
46
-
47
-
48
-
49
-
50
-
51
-
52
-
53
-
54
-
55
-
56
-
57
-
58
-
59
-
60
-
61
-
62
-
63
-
64
-
65
-
66
-
67
-
68
-
69
-
70
-
71
-
72
-
73
-
74
-
75
-
76
-
77
-
78
-
79
-
80
-
81
-
82
-
83
-
84
-
85
-
86
-
87
-
88
-
89
-
90
-
91
-
92
-
93
-
94
-
95
-
96
-
97
-
98
-
99
-
100
-
101
-
102
-
103
-
104
-
105
-
106
-
107
-
108
-
109
-
110
-
111
-
112
-
113
-
114
-
115
-
116
-
117
-
118
-
119
-
120
-
121
-
122
-
123
-
124
-
125
-
126
-
 127
127 -
 128
128 -
 129
129 -
 130
130 -
 131
131 -
 132
132 -
 133
133 -
 134
134 -
 135
135 -
 136
136 -
 137
137 -
138
-
139
-
140
-
141
-
142
-
143
-
144
-
145
-
146
-
147
-
148
-
149
-
150
-
151
-
152
-
153
-
154
-
155
-
156
-
157
-
158
-
159
-
160
-
161
-
162
-
163
-
164
-
165
-
166
-
167
-
168
-
169
-
170
-
171
-
172
-
173
-
174
-
175
-
176
-
177
-
178
-
179
-
180
-
181
-
182
-
183
-
184
-
185
-
186
-
187
-
188
-
189
-
190
-
191
-
192
-
193
-
194
-
195
-
196
-
197
-
198
-
199
-
200
-
201
-
202
 |
 |