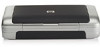
HP Deskjet 460 User's Guide - Page 31
To print from a PictBridge-compatible camera, To transfer photos to your computer - driver mac
 |
View all HP Deskjet 460 manuals
Add to My Manuals
Save this manual to your list of manuals |
Page 31 highlights
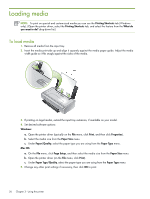
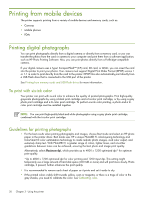
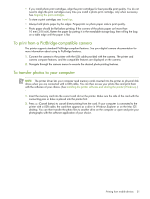
• If you install photo print cartridges, align the print cartridges for best possible print quality. You do not need to align the print cartridges every time you install a photo print cartridge, only when necessary. See Aligning the print cartridges. • To store a print cartridge, see Travel tips. • Always hold photo paper by the edges. Fingerprints on photo paper reduce print quality. • Photo paper should be flat before printing. If the corners of the photo paper curl more than 10 mm (3/8 inch), flatten the paper by putting it in the resealable storage bag, then rolling the bag on a table edge until the paper is flat. To print from a PictBridge-compatible camera The printer supports standard PictBridge-compliant features. See your digital camera documentation for more information about using its PictBridge features. 1. Connect the camera to the printer with the USB cable provided with the camera. The printer and camera compare features, and the compatible features are displayed on the camera. 2. Navigate through the camera menus to execute the desired photo-printing features. To transfer photos to your computer NOTE: The printer driver lets your computer read memory cards inserted into the printer as physical disk drives when you are connected with a USB cable. You can then access your photo files and print them with the software of your choice. (See Installing the printer software and sharing the printer (Windows).) 1. Insert the memory card into the correct card slot on the printer. Make sure the side of the card with the connecting pins or holes is placed into the printer first. 2. Press (Cancel button) to cancel direct printing from the card. If your computer is connected to the printer with a USB cable, the card then appears as a drive in Windows Explorer or on the Mac OS desktop. You can then transfer the photo files to another drive on the computer or open and print your photographs with the software application of your choice. Printing from mobile devices 31
-
 1
1 -
2
-
3
-
4
-
5
-
6
-
7
-
8
-
9
-
10
-
11
-
12
-
13
-
14
-
15
-
16
-
17
-
18
-
19
-
20
-
21
-
22
-
23
-
24
-
25
-
 26
26 -
 27
27 -
 28
28 -
 29
29 -
 30
30 -
 31
31 -
 32
32 -
 33
33 -
 34
34 -
 35
35 -
 36
36 -
37
-
38
-
39
-
40
-
41
-
42
-
43
-
44
-
45
-
46
-
47
-
48
-
49
-
50
-
51
-
52
-
53
-
54
-
55
-
56
-
57
-
58
-
59
-
60
-
61
-
62
-
63
-
64
-
65
-
66
-
67
-
68
-
69
-
70
-
71
-
72
-
73
-
74
-
75
-
76
-
77
-
78
-
79
-
80
-
81
-
82
-
83
-
84
-
85
-
86
-
87
-
88
-
89
-
90
-
91
-
92
-
93
-
94
-
95
-
96
-
97
-
98
-
99
-
100
-
101
-
102
-
103
-
104
-
105
-
106
-
107
-
108
-
109
-
110
-
111
-
112
-
113
-
114
-
115
-
116
-
117
-
118
-
119
-
120
-
121
-
122
-
123
-
124
-
125
-
126
-
127
-
128
-
129
-
130
-
131
-
132
 |
 |
