HP ENVY 17-2100 GETTING STARTED - Windows 7 (For select 3D Models Only) - Page 70
Replace the memory module compartment cover., snap into place.
 |
View all HP ENVY 17-2100 manuals
Add to My Manuals
Save this manual to your list of manuals |
Page 70 highlights
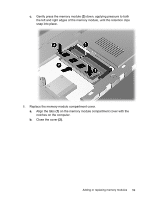
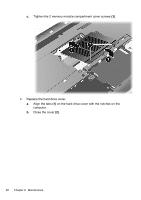
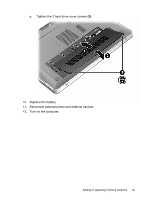
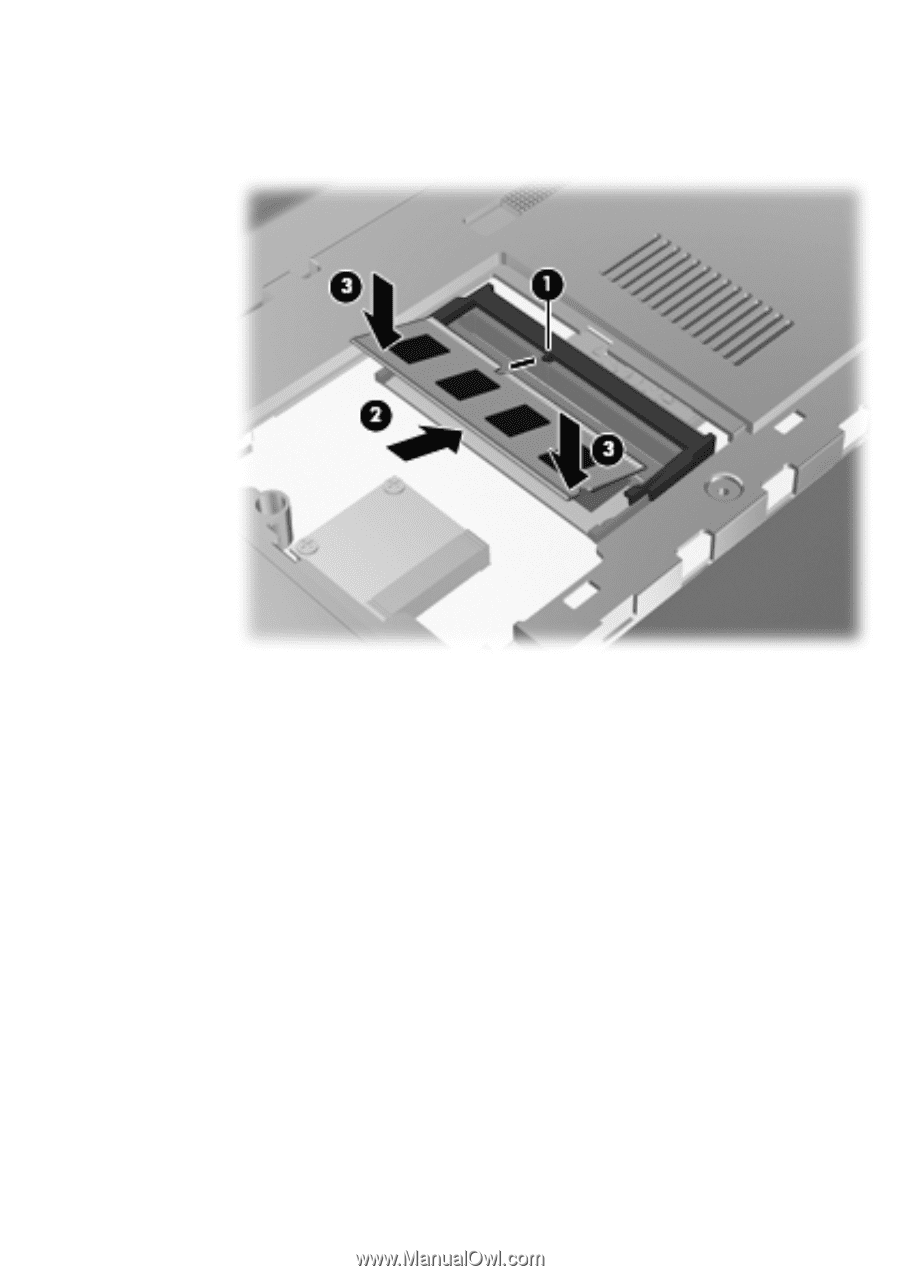
c. Gently press the memory module (3) down, applying pressure to both the left and right edges of the memory module, until the retention clips snap into place. 8. Replace the memory module compartment cover. a. Align the tabs (1) on the memory module compartment cover with the notches on the computer. b. Close the cover (2). Adding or replacing memory modules 59
-
 1
1 -
2
-
3
-
4
-
5
-
6
-
7
-
8
-
9
-
10
-
11
-
12
-
13
-
14
-
15
-
16
-
17
-
18
-
19
-
20
-
21
-
22
-
23
-
24
-
25
-
26
-
27
-
28
-
29
-
30
-
31
-
32
-
33
-
34
-
35
-
36
-
37
-
38
-
39
-
40
-
41
-
42
-
43
-
44
-
45
-
46
-
47
-
48
-
49
-
50
-
51
-
52
-
53
-
54
-
55
-
56
-
57
-
58
-
59
-
60
-
61
-
62
-
63
-
64
-
 65
65 -
 66
66 -
 67
67 -
 68
68 -
 69
69 -
 70
70 -
 71
71 -
 72
72 -
 73
73 -
 74
74 -
 75
75 -
76
-
77
-
78
-
79
-
80
-
81
-
82
-
83
-
84
-
85
-
86
-
87
-
88
-
89
-
90
 |
 |
c.
Gently press the memory module
(3)
down, applying pressure to both
the left and right edges of the memory module, until the retention clips
snap into place.
8.
Replace the memory module compartment cover.
a.
Align the tabs
(1)
on the memory module compartment cover with the
notches on the computer.
b.
Close the cover
(2)
.
Adding or replacing memory modules
59