HP G6000XX Compaq Presario F500 and G6000 Notebook PC - Maintenance and Servic - Page 45
Remove the optical drive bracket, Reverse this procedure to reassemble and install the optical drive.
 |
View all HP G6000XX manuals
Add to My Manuals
Save this manual to your list of manuals |
Page 45 highlights
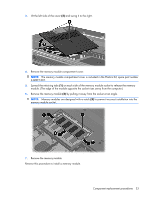
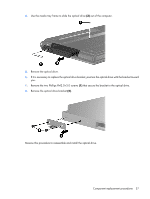
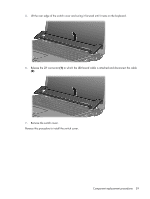
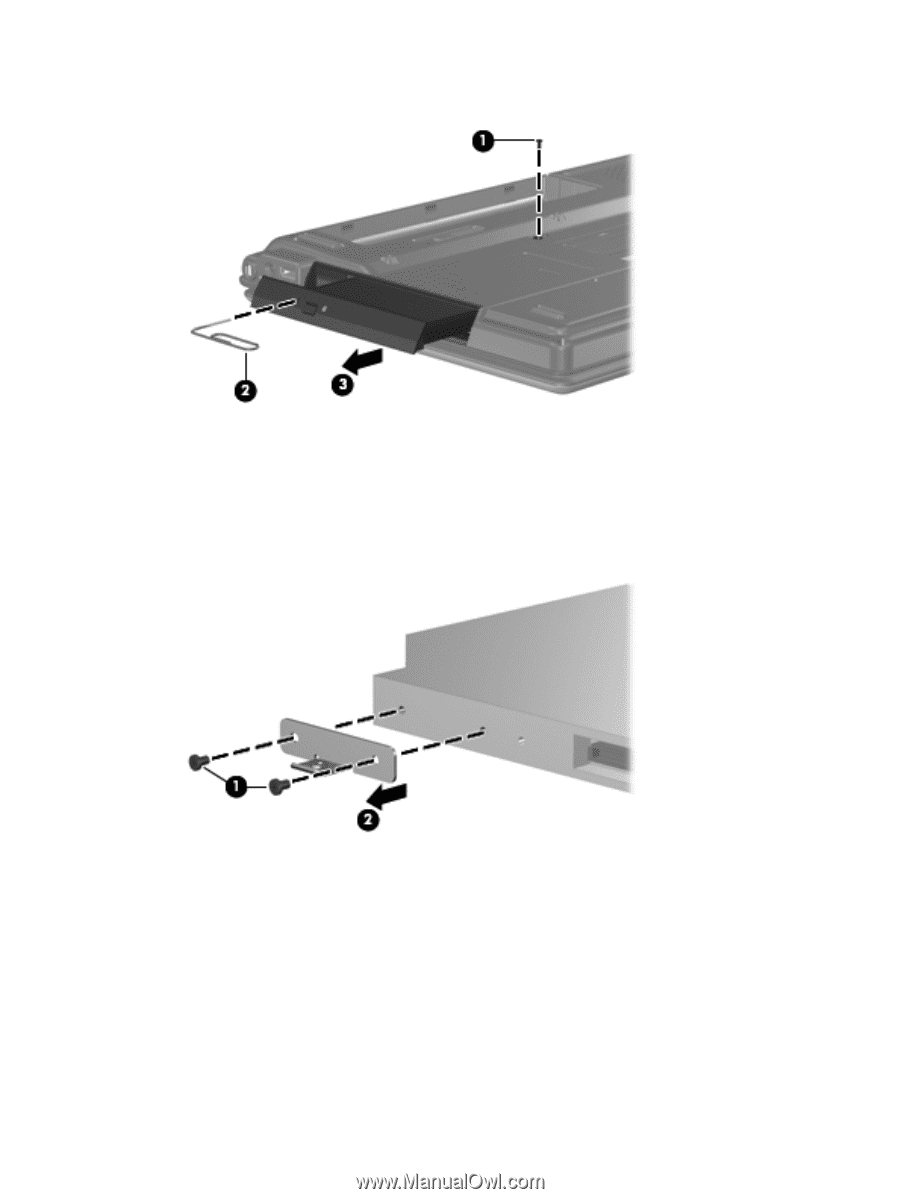
4. Use the media tray frame to slide the optical drive (3) out of the computer. 5. Remove the optical drive. 6. If it is necessary to replace the optical drive bracket, position the optical drive with the bracket toward you. 7. Remove the two Phillips PM2.0×3.0 screws (1) that secure the bracket to the optical drive. 8. Remove the optical drive bracket (2). Reverse this procedure to reassemble and install the optical drive. Component replacement procedures 37
-
 1
1 -
2
-
3
-
4
-
5
-
6
-
7
-
8
-
9
-
10
-
11
-
12
-
13
-
14
-
15
-
16
-
17
-
18
-
19
-
20
-
21
-
22
-
23
-
24
-
25
-
26
-
27
-
28
-
29
-
30
-
31
-
32
-
33
-
34
-
35
-
36
-
37
-
38
-
39
-
 40
40 -
 41
41 -
 42
42 -
 43
43 -
 44
44 -
 45
45 -
 46
46 -
 47
47 -
 48
48 -
 49
49 -
 50
50 -
51
-
52
-
53
-
54
-
55
-
56
-
57
-
58
-
59
-
60
-
61
-
62
-
63
-
64
-
65
-
66
-
67
-
68
-
69
-
70
-
71
-
72
-
73
-
74
-
75
-
76
-
77
-
78
-
79
-
80
-
81
-
82
-
83
-
84
-
85
-
86
-
87
-
88
-
89
-
90
-
91
-
92
-
93
-
94
-
95
-
96
-
97
-
98
-
99
-
100
-
101
-
102
-
103
-
104
-
105
-
106
-
107
-
108
-
109
-
110
-
111
-
112
-
113
-
114
-
115
-
116
-
117
-
118
-
119
-
120
-
121
-
122
 |
 |
4
.
Use the media tray frame to slide the optical drive
(3)
out of the computer.
5
.
Remove the optical drive.
6
.
If it is necessary to replace the optical drive bracket, position the optical drive with the bracket toward
you.
7
.
Remove the two Phillips PM2.0×3.0 screws
(1)
that secure the bracket to the optical drive.
8
.
Remove the optical drive bracket
(2)
.
Reverse this procedure to reassemble and install the optical drive.
Component replacement procedures
37