HP LH3000r HP NetRAID-4M Installation Guide - Page 21
Connecting Internal SCSI Devices, Connecting SCSI Array Enclosures Storage, Subsystems
 |
View all HP LH3000r manuals
Add to My Manuals
Save this manual to your list of manuals |
Page 21 highlights
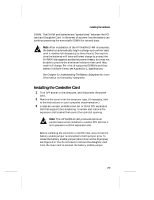
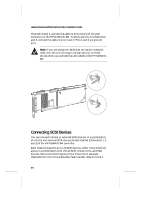
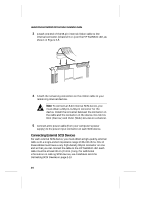
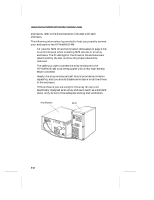
Installing the Hardware channels are 160 MBytes/sec. Connecting a non-Ultra 3 peripheral to an Ultra 3 SCSI channel may limit the entire channel to lower performance levels. If you are installing your SCSI devices inside an array enclosure, see Connecting SCSI Array Enclosures (Storage Subsystems) on page 2-11. Connecting Internal SCSI Devices To connect internal SCSI devices to each SCSI channel, you must use an internal 68-pin SCSI cable that has enough connectors to accommodate all your devices. (See Installation Hints for Connecting SCSI Devices on page 2-13 for additional information on cabling SCSI devices.) Follow these steps to connect internal SCSI devices: 1 Prepare each SCSI device for installation: - Make sure each device is assigned a unique SCSI ID number from 0 to 6, or 8 to 15 (the HP NetRAID-4M controller is set to ID 7 by default; we recommend leaving this setting at 7). You can use SCSISelect in the HP NetRAID-4M BIOS to change the IDs. In general avoid using IDs 6 or 15. No duplicate IDs are permitted on a channel. (See SCSI ID Numbers on page 2-14 for additional information.) - If you are using a cable that has a built-in terminator, remove (or disable) the terminators on each internal device. If your cable does not have a built-in terminator, you must install (or enable) the terminators on only the internal device you are attaching to the end of the cable. (See SCSI Termination on page 2-14 for additional information.) - HP internal/external disk enclosures are self terminating. 2 Install and mount each internal SCSI device in an available drive bay inside your computer. (Refer to your computer and device documentation for instructions.) 2-7
-
 1
1 -
2
-
3
-
4
-
5
-
6
-
7
-
8
-
9
-
10
-
11
-
12
-
13
-
14
-
15
-
 16
16 -
 17
17 -
 18
18 -
 19
19 -
 20
20 -
 21
21 -
 22
22 -
 23
23 -
 24
24 -
 25
25 -
 26
26 -
27
-
28
-
29
-
30
-
31
-
32
-
33
-
34
-
35
-
36
-
37
-
38
-
39
-
40
-
41
-
42
-
43
-
44
-
45
-
46
-
47
-
48
-
49
-
50
-
51
-
52
-
53
-
54
-
55
-
56
-
57
-
58
-
59
-
60
-
61
-
62
-
63
-
64
-
65
-
66
-
67
-
68
-
69
-
70
-
71
-
72
-
73
-
74
-
75
-
76
-
77
-
78
-
79
-
80
-
81
-
82
-
83
-
84
-
85
-
86
-
87
-
88
-
89
-
90
-
91
-
92
-
93
-
94
-
95
-
96
-
97
-
98
-
99
-
100
-
101
-
102
-
103
-
104
-
105
-
106
-
107
-
108
-
109
-
110
-
111
-
112
-
113
-
114
-
115
-
116
-
117
-
118
-
119
-
120
-
121
-
122
-
123
-
124
 |
 |