HP LH4r HP Netserver LXr 8000 Memory Upgrade Guide - Page 24
Removing the Memory Board
 |
View all HP LH4r manuals
Add to My Manuals
Save this manual to your list of manuals |
Page 24 highlights
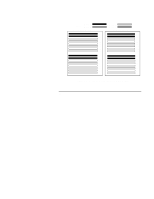
Removing the Memory Board To remove the memory board, follow this procedure: 1. Power down the HP NetServer. See Chapter 2 of the HP NetServer LXr 8000 Installation Guide for details. 2. Remove the HP NetServer's front bezel. See Chapter 3 of the HP NetServer LXr 8000 Installation Guide for details. 3. On the front of the HP NetServer, locate the LCD display. On top of the display's housing is a small handle. With one finger, pull up on this handle. The LCD display should move up about ½ inch and stop. See Figure 2-8. NOTE If you do not push the LCD display up and out of the way, you cannot remove the panel that covers the memory bays. 18
-
 1
1 -
2
-
3
-
4
-
5
-
6
-
7
-
8
-
9
-
10
-
11
-
12
-
13
-
14
-
15
-
16
-
17
-
18
-
 19
19 -
 20
20 -
 21
21 -
 22
22 -
 23
23 -
 24
24 -
 25
25 -
 26
26 -
 27
27 -
 28
28 -
 29
29 -
30
-
31
-
32
-
33
-
34
-
35
-
36
 |
 |

18
Removing the Memory Board
To remove the memory board, follow this procedure:
1.
Power down the HP NetServer. See Chapter 2 of the
HP
NetServer LXr 8000 Installation Guide
for details.
2.
Remove the HP NetServer’s front bezel. See Chapter 3 of the
HP
NetServer LXr 8000 Installation Guide
for details.
3.
On the front of the HP NetServer, locate the LCD display. On top
of the display's housing is a small handle. With one finger, pull up
on this handle. The LCD display should move up about ½ inch
and stop. See Figure 2-8.
NOTE
If you do not push the LCD display up and out of the
way, you cannot remove the panel that covers the
memory bays.