HP LaserJet 1100 HP LaserJet 1100 Printer - TimbHC.Book - Page 106
Installing DIMMs (memory), Appendix C Memory DIMMs
 |
View all HP LaserJet 1100 manuals
Add to My Manuals
Save this manual to your list of manuals |
Page 106 highlights
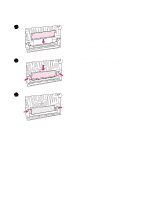
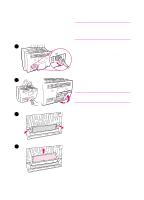
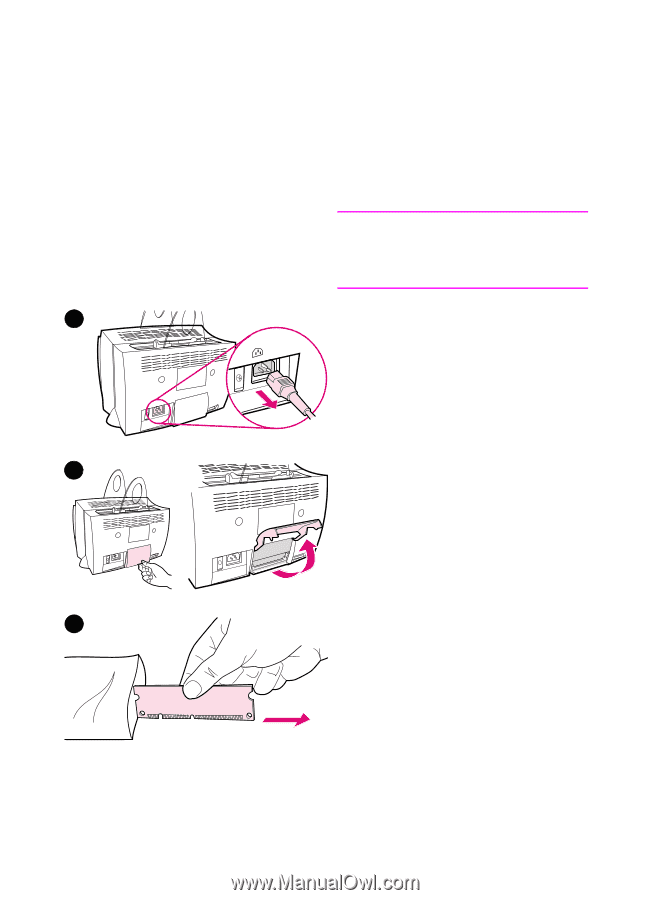
Installing DIMMs (memory) Adding memory (RAM only) to the HP LaserJet 1100 will enable you to print more complex print jobs. To install DIMMs, follow the instructions below: CAUTION Handling a DIMM chip (memory) without wearing a grounded, anti-static device can damage the DIMM chip. 1 1 Unplug the printer. 2 Open the printer memory door by gently pulling out and upward on the bottom edge until the door supports itself. 3 Remove the DIMM chip from the anti-static bag in which it came by grasping the chip on the top edge. 2 Continued on next page. 3 98 Appendix C Memory (DIMMs) EN
-
 1
1 -
2
-
3
-
4
-
5
-
6
-
7
-
8
-
9
-
10
-
11
-
12
-
13
-
14
-
15
-
16
-
17
-
18
-
19
-
20
-
21
-
22
-
23
-
24
-
25
-
26
-
27
-
28
-
29
-
30
-
31
-
32
-
33
-
34
-
35
-
36
-
37
-
38
-
39
-
40
-
41
-
42
-
43
-
44
-
45
-
46
-
47
-
48
-
49
-
50
-
51
-
52
-
53
-
54
-
55
-
56
-
57
-
58
-
59
-
60
-
61
-
62
-
63
-
64
-
65
-
66
-
67
-
68
-
69
-
70
-
71
-
72
-
73
-
74
-
75
-
76
-
77
-
78
-
79
-
80
-
81
-
82
-
83
-
84
-
85
-
86
-
87
-
88
-
89
-
90
-
91
-
92
-
93
-
94
-
95
-
96
-
97
-
98
-
99
-
100
-
 101
101 -
 102
102 -
 103
103 -
 104
104 -
 105
105 -
 106
106 -
 107
107 -
 108
108 -
 109
109 -
 110
110 -
 111
111 -
112
-
113
-
114
-
115
-
116
-
117
-
118
-
119
-
120
-
121
-
122
-
123
-
124
-
125
-
126
-
127
-
128
 |
 |
98
Appendix C Memory (DIMMs)
EN
Installing DIMMs (memory)
Adding memory (RAM only) to the
HP LaserJet 1100 will enable you to print
more complex print jobs.
To install DIMMs, follow the instructions
below:
CAUTION
Handling a DIMM chip (memory) without
wearing a grounded, anti-static device
can damage the DIMM chip.
1
Unplug the printer.
2
Open the printer memory door by
gently pulling out and upward on the
bottom edge until the door supports
itself.
3
Remove the DIMM chip from the
anti-static bag in which it came by
grasping the chip on the top edge.
Continued on next page.
1
2
3