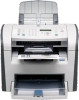
HP LaserJet 3000 HP LaserJet 3050/3052/3055/3390/3392 All-in-One User Guide - Page 256
To con a direct-connected shared all-in-one (client server printing)
 |
View all HP LaserJet 3000 manuals
Add to My Manuals
Save this manual to your list of manuals |
Page 256 highlights
To configure a direct-connected shared all-in-one (client server printing) In this configuration, the all-in-one is connected to a computer through a USB cable, the computer is connected to the network, and the all-in-one is shared with other computers on the network. 1. Insert the all-in-one CD into your computer. If you have already set up your all-in-one, click Install Software to start the software installer. If the software installer does not start, navigate to the hpsetup.exe file on the CD and double-click the file. 2. Click Install HP LaserJet 3390/3392 all-in-one Software. 3. On the Welcome screen, click Next. 4. On the Installer updates screen, click Yes to search for installer updates on the Web. 5. For Windows 2000, on the Installation Options screen, choose the installation option. Hewlett- Packard recommends a typical installation, if your system supports it. 6. On the License Agreement screen, read the license agreement, indicate that you accept the terms, and then click Next. 7. For Windows 2000, on the HP Extended Capabilities screen, choose whether you want extended capabilities, and then click Next. 8. On the Destination Folder screen, choose the destination folder, and then click Next. 9. On the Ready to Install screen, click Next to begin installation. NOTE If you want to change your settings, instead of clicking Next, click Back to return to previous screens, and then change the settings. 10. On the Connection Type screen, select Directly to this computer, and then click Next. 11. Connect the USB cable. 12. Allow the installation process to complete. 13. On the Windows taskbar, click Start, click Settings, and then click Printers. ● In Windows XP, click Start, click Control Panel, and then double-click Printers and Faxes. 14. In the dialog box, right-click the all-in-one, and then click Sharing. 15. Select Share this printer, type the all-in-one name if necessary, and then click OK. 238 Chapter 11 How do I? ENWW
-
 1
1 -
2
-
3
-
4
-
5
-
6
-
7
-
8
-
9
-
10
-
11
-
12
-
13
-
14
-
15
-
16
-
17
-
18
-
19
-
20
-
21
-
22
-
23
-
24
-
25
-
26
-
27
-
28
-
29
-
30
-
31
-
32
-
33
-
34
-
35
-
36
-
37
-
38
-
39
-
40
-
41
-
42
-
43
-
44
-
45
-
46
-
47
-
48
-
49
-
50
-
51
-
52
-
53
-
54
-
55
-
56
-
57
-
58
-
59
-
60
-
61
-
62
-
63
-
64
-
65
-
66
-
67
-
68
-
69
-
70
-
71
-
72
-
73
-
74
-
75
-
76
-
77
-
78
-
79
-
80
-
81
-
82
-
83
-
84
-
85
-
86
-
87
-
88
-
89
-
90
-
91
-
92
-
93
-
94
-
95
-
96
-
97
-
98
-
99
-
100
-
101
-
102
-
103
-
104
-
105
-
106
-
107
-
108
-
109
-
110
-
111
-
112
-
113
-
114
-
115
-
116
-
117
-
118
-
119
-
120
-
121
-
122
-
123
-
124
-
125
-
126
-
127
-
128
-
129
-
130
-
131
-
132
-
133
-
134
-
135
-
136
-
137
-
138
-
139
-
140
-
141
-
142
-
143
-
144
-
145
-
146
-
147
-
148
-
149
-
150
-
151
-
152
-
153
-
154
-
155
-
156
-
157
-
158
-
159
-
160
-
161
-
162
-
163
-
164
-
165
-
166
-
167
-
168
-
169
-
170
-
171
-
172
-
173
-
174
-
175
-
176
-
177
-
178
-
179
-
180
-
181
-
182
-
183
-
184
-
185
-
186
-
187
-
188
-
189
-
190
-
191
-
192
-
193
-
194
-
195
-
196
-
197
-
198
-
199
-
200
-
201
-
202
-
203
-
204
-
205
-
206
-
207
-
208
-
209
-
210
-
211
-
212
-
213
-
214
-
215
-
216
-
217
-
218
-
219
-
220
-
221
-
222
-
223
-
224
-
225
-
226
-
227
-
228
-
229
-
230
-
231
-
232
-
233
-
234
-
235
-
236
-
237
-
238
-
239
-
240
-
241
-
242
-
243
-
244
-
245
-
246
-
247
-
248
-
249
-
250
-
 251
251 -
 252
252 -
 253
253 -
 254
254 -
 255
255 -
 256
256 -
 257
257 -
 258
258 -
 259
259 -
 260
260 -
 261
261 -
262
-
263
-
264
-
265
-
266
-
267
-
268
-
269
-
270
-
271
-
272
-
273
-
274
-
275
-
276
-
277
-
278
-
279
-
280
-
281
-
282
-
283
-
284
-
285
-
286
-
287
-
288
-
289
-
290
-
291
-
292
-
293
-
294
-
295
-
296
-
297
-
298
-
299
-
300
-
301
-
302
-
303
-
304
-
305
-
306
-
307
-
308
-
309
-
310
-
311
-
312
-
313
-
314
-
315
-
316
-
317
-
318
-
319
-
320
-
321
-
322
-
323
-
324
-
325
-
326
-
327
-
328
-
329
-
330
-
331
-
332
-
333
-
334
-
335
-
336
-
337
-
338
-
339
-
340
-
341
-
342
-
343
-
344
-
345
-
346
-
347
-
348
-
349
-
350
-
351
-
352
-
353
-
354
-
355
-
356
-
357
-
358
-
359
-
360
-
361
-
362
-
363
-
364
-
365
-
366
-
367
-
368
-
369
-
370
-
371
-
372
-
373
-
374
-
375
-
376
-
377
-
378
-
379
-
380
-
381
-
382
-
383
-
384
-
385
-
386
-
387
-
388
-
389
-
390
-
391
-
392
-
393
-
394
-
395
-
396
-
397
-
398
-
399
-
400
-
401
-
402
-
403
-
404
-
405
-
406
-
407
-
408
-
409
-
410
-
411
-
412
-
413
-
414
-
415
-
416
-
417
-
418
-
419
-
420
-
421
-
422
-
423
-
424
-
425
-
426
-
427
-
428
-
429
-
430
 |
 |