HP LaserJet 4100 HP LaserJet 4100 Series - User Guide - Page 102
Clearing jams from the optional envelope feeder
 |
View all HP LaserJet 4100 manuals
Add to My Manuals
Save this manual to your list of manuals |
Page 102 highlights
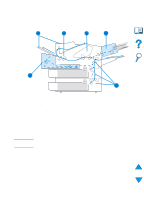
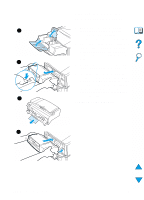
Clearing jams from the optional envelope feeder 1 Remove any envelopes loaded in 1 the envelope feeder. Lower the envelope weight and lift the tray extension up to the closed position. 2 Press and hold the release button on the left side of the envelope feeder. Grasp both sides of the envelope feeder and carefully pull it out of the printer. 2 3 Slowly remove any envelopes out of the envelope feeder and the printer. 4 Insert the envelope feeder into the printer until it locks into place. (The connector on the top right side of the envelope feeder fits into the plug in the printer.) Pull gently on the envelope feeder to be sure that it is securely in place. 3 Continued on the next page. 4 100 Chapter 4 - Problem solving EN
-
 1
1 -
2
-
3
-
4
-
5
-
6
-
7
-
8
-
9
-
10
-
11
-
12
-
13
-
14
-
15
-
16
-
17
-
18
-
19
-
20
-
21
-
22
-
23
-
24
-
25
-
26
-
27
-
28
-
29
-
30
-
31
-
32
-
33
-
34
-
35
-
36
-
37
-
38
-
39
-
40
-
41
-
42
-
43
-
44
-
45
-
46
-
47
-
48
-
49
-
50
-
51
-
52
-
53
-
54
-
55
-
56
-
57
-
58
-
59
-
60
-
61
-
62
-
63
-
64
-
65
-
66
-
67
-
68
-
69
-
70
-
71
-
72
-
73
-
74
-
75
-
76
-
77
-
78
-
79
-
80
-
81
-
82
-
83
-
84
-
85
-
86
-
87
-
88
-
89
-
90
-
91
-
92
-
93
-
94
-
95
-
96
-
 97
97 -
 98
98 -
 99
99 -
 100
100 -
 101
101 -
 102
102 -
 103
103 -
 104
104 -
 105
105 -
 106
106 -
 107
107 -
108
-
109
-
110
-
111
-
112
-
113
-
114
-
115
-
116
-
117
-
118
-
119
-
120
-
121
-
122
-
123
-
124
-
125
-
126
-
127
-
128
-
129
-
130
-
131
-
132
-
133
-
134
-
135
-
136
-
137
-
138
-
139
-
140
-
141
-
142
-
143
-
144
-
145
-
146
-
147
-
148
-
149
-
150
-
151
-
152
-
153
-
154
-
155
-
156
-
157
-
158
-
159
-
160
-
161
-
162
-
163
-
164
-
165
-
166
-
167
-
168
-
169
-
170
-
171
-
172
-
173
-
174
-
175
-
176
-
177
-
178
-
179
-
180
-
181
-
182
-
183
-
184
-
185
-
186
-
187
-
188
-
189
-
190
-
191
-
192
-
193
-
194
-
195
-
196
-
197
-
198
-
199
-
200
-
201
-
202
-
203
-
204
-
205
-
206
-
207
-
208
-
209
-
210
-
211
-
212
-
213
-
214
-
215
-
216
-
217
-
218
-
219
-
220
-
221
-
222
-
223
-
224
-
225
-
226
-
227
-
228
-
229
-
230
-
231
-
232
-
233
-
234
-
235
-
236
-
237
-
238
-
239
-
240
-
241
-
242
-
243
-
244
-
245
-
246
-
247
-
248
-
249
-
250
-
251
-
252
-
253
-
254
-
255
-
256
-
257
-
258
-
259
-
260
-
261
-
262
-
263
-
264
-
265
-
266
-
267
-
268
-
269
-
270
-
271
-
272
-
273
-
274
-
275
-
276
-
277
-
278
 |
 |
100
Chapter
4 - Problem solving
EN
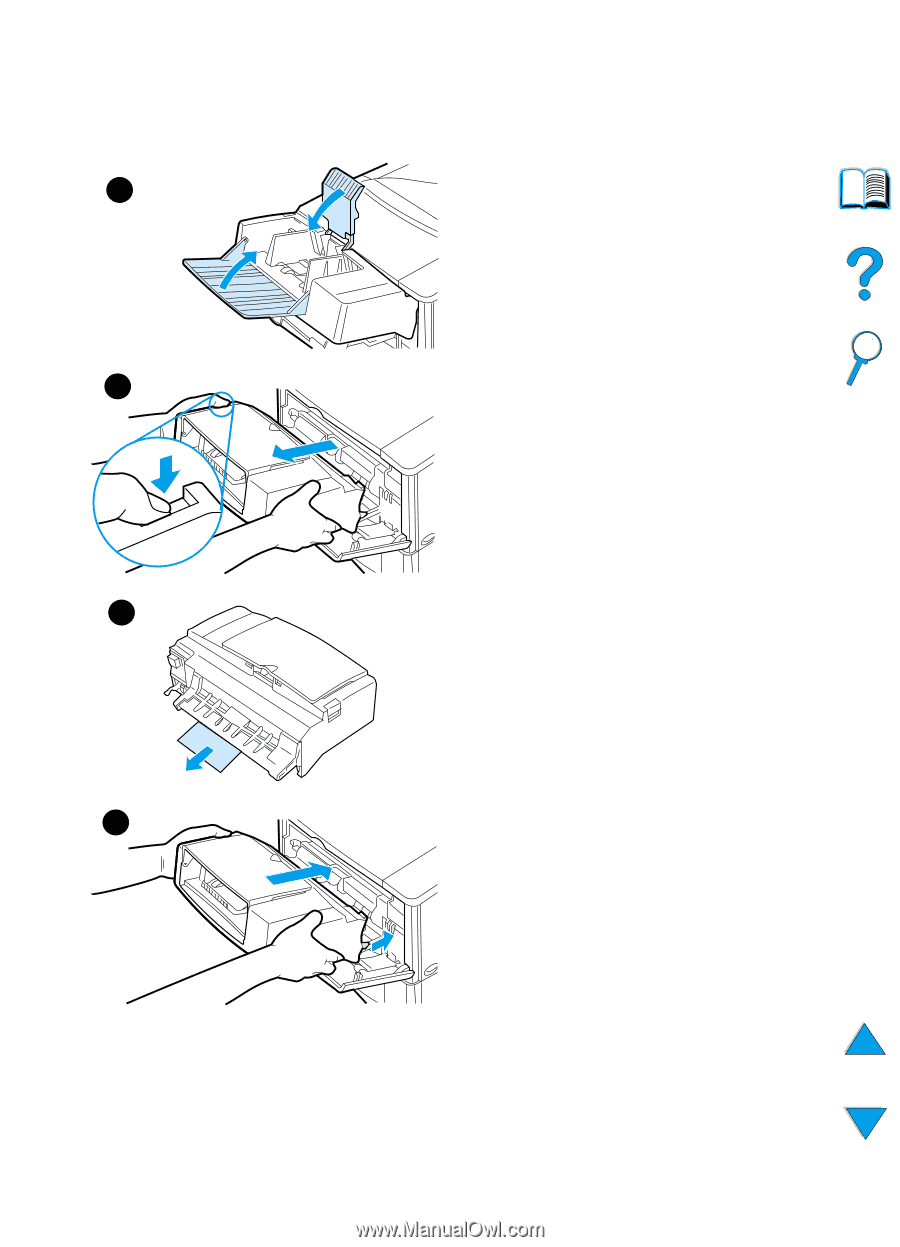
Clearing jams from the
optional envelope feeder
1
Remove any envelopes loaded in
the envelope feeder. Lower the
envelope weight and lift the tray
extension up to the closed position.
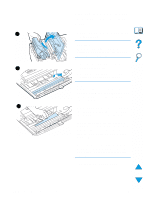
2
Press and hold the release button on
the left side of the envelope feeder.
Grasp both sides of the envelope
feeder and carefully pull it out of the
printer.
3
Slowly remove any envelopes out of
the envelope feeder and the printer.
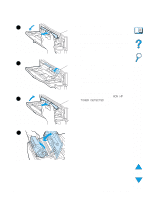
4
Insert the envelope feeder into the
printer until it locks into place. (The
connector on the top right side of the
envelope feeder fits into the plug in
the printer.) Pull gently on the
envelope feeder to be sure that it is
securely in place.
Continued on the next page.
4
1
2
3