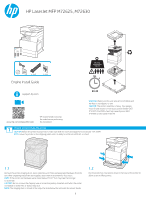
HP LaserJet MFP M72625-M72630 Engine Install Guide - Page 5
Install the toner collection unit TCU., Install the paper settling guides., Load paper in Tray 2.
 |
View all HP LaserJet MFP M72625-M72630 manuals
Add to My Manuals
Save this manual to your list of manuals |
Page 5 highlights
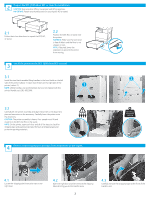
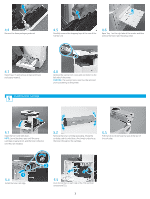
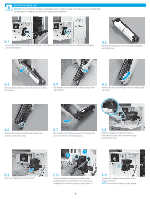
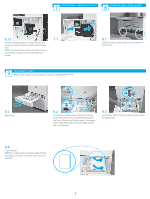
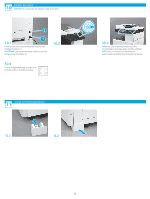
7 Install the toner collection unit (TCU). 8 Install the paper settling guides. 6.12 Route the cable through the channel between the imaging unit and connector, and then close the right door. NOTE: The interlock lever slides into place to prevent removing the imaging unit when the right door is closed. 7.1 9 Load paper in Tray 2. NOTE: Paper is used to print configuration sheets as needed (Letter or A4). 8.1 Install the paper settling guides at two locations on the first exit. 9.1 Open Tray 2. 9.2 Push down on the blue tab in the back of the tray. At the same time, pinch or squeeze the blue tab in the front of the tray and slide to adjust to the proper paper length. Both tabs are spring-loaded and will lock, once released. 9.3 Squeeze the sides of the tab, and then slide to adjust the paper width. 9.4 Load the paper. NOTE: A4 or Letter paper should be loaded with the long edge of the paper on the right side of the tray, as shown. 5
-
 1
1 -
 2
2 -
 3
3 -
 4
4 -
 5
5 -
 6
6 -
 7
7 -
 8
8
 |
 |
