HP Media Center 863n HP Media Center Desktop PCs - (English) Hardware User Gui - Page 63
HP Media Center 863n Manual
 |
View all HP Media Center 863n manuals
Add to My Manuals
Save this manual to your list of manuals |
Page 63 highlights
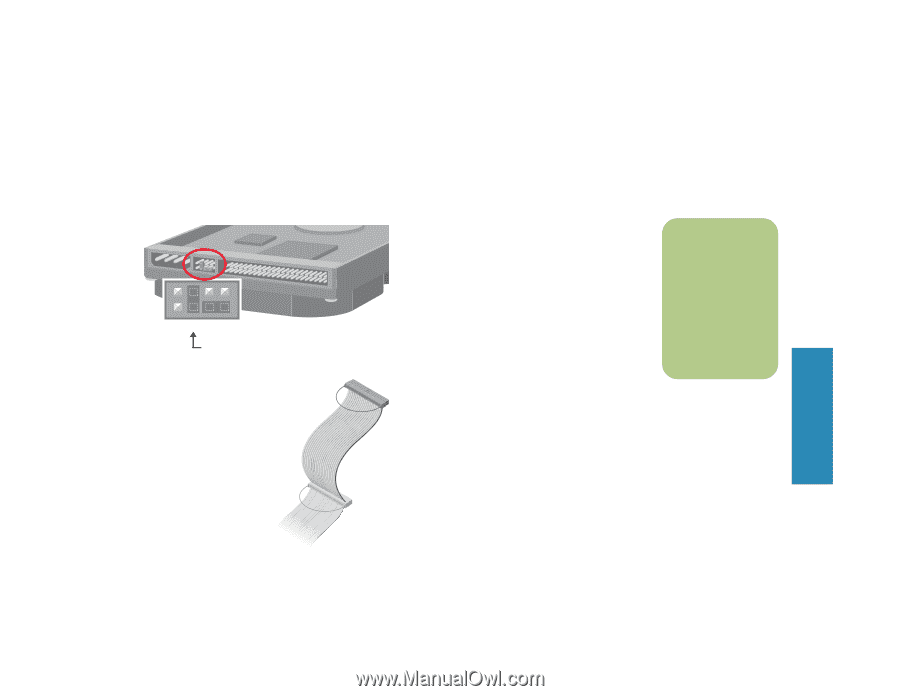
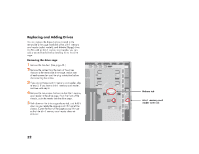
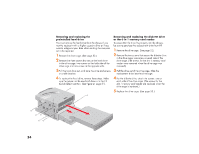
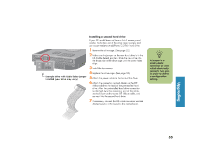
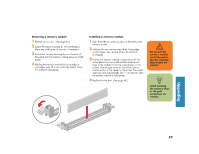
Installing a second hard drive If your PC model does not have a 6-In-1 memory card reader, the bottom slot of the drive cage is empty and can accommodate an additional 3.5-inch hard drive. 1 Remove the drive cage. (See page 52.) 2 Make sure the jumper on the new hard drive is in the CS (Cable Select) position. Slide the new drive into the empty slot in the drive cage until the screw holes align. CS SL MA Example drive with Cable Select jumper installed (your drive may vary) 3 Install the two screws. 4 Replace the drive cage. (See page 53.) 5 Attach the power cable to the back of the drive. 6 Attach the connector marked Master on the IDE A jumper is a small plastic connector or wire which electrically connects two pins in order to define a configuration setting. n Upgrading MA ST ER ribbon cable to the back of the preinstalled hard drive. After the preinstalled hard drive connection is attached, twist the remaining part of the cable, marked Slave on that same IDE ribbon cable, and connect it to the second hard drive. 7 If necessary, connect the IDE cable connector marked Motherboard or CPU board to the motherboard. SL AV E 55
-
 1
1 -
2
-
3
-
4
-
5
-
6
-
7
-
8
-
9
-
10
-
11
-
12
-
13
-
14
-
15
-
16
-
17
-
18
-
19
-
20
-
21
-
22
-
23
-
24
-
25
-
26
-
27
-
28
-
29
-
30
-
31
-
32
-
33
-
34
-
35
-
36
-
37
-
38
-
39
-
40
-
41
-
42
-
43
-
44
-
45
-
46
-
47
-
48
-
49
-
50
-
51
-
52
-
53
-
54
-
55
-
56
-
57
-
 58
58 -
 59
59 -
 60
60 -
 61
61 -
 62
62 -
 63
63 -
 64
64 -
 65
65 -
 66
66 -
 67
67 -
 68
68 -
69
-
70
-
71
-
72
-
73
-
74
-
75
-
76
-
77
-
78
-
79
-
80
-
81
-
82
 |
 |