HP Media Center 894c HP Media Center Desktop PCs - (English) Hardware User Gui - Page 62
HP Media Center 894c Manual
 |
View all HP Media Center 894c manuals
Add to My Manuals
Save this manual to your list of manuals |
Page 62 highlights
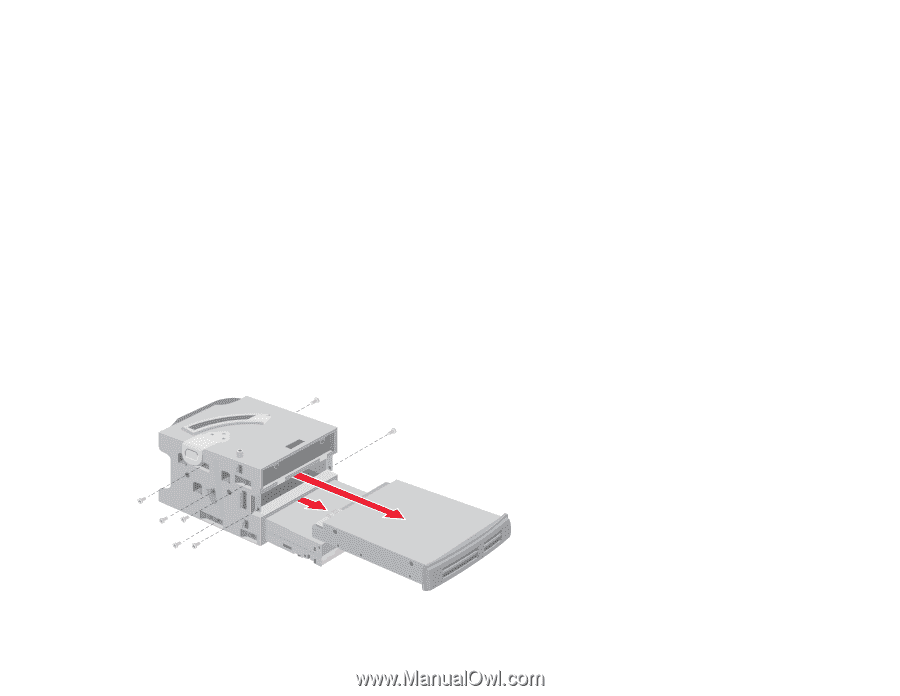
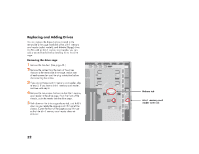
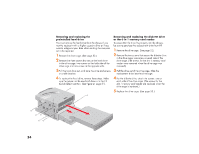
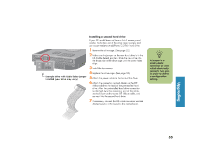
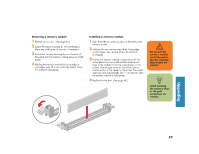
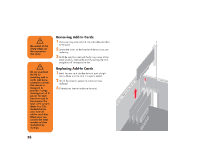
Removing and replacing the preinstalled hard drive You must remove the hard drive from the chassis if you want to replace it with a higher capacity drive or if you want to safeguard your data when sending the computer out to be repaired. Removing and replacing the diskette drive or the 6-In-1 memory card reader To ensure that the drive fits properly into the chassis, be sure to purchase the replacement drive from HP. 1 Remove the drive cage. (See page 52.) 2 Remove the three screws that secure the hard drive 1 Remove the drive cage. (See page 52.) 2 Remove the two screws that secure the diskette drive in the drive cage: one screw on each side of the drive cage. (The screws for the 6-In-1 memory card reader were removed when the drive cage was removed.) replacement drive into the drive cage. in the drive cage: two screws on the latch side of the drive cage and one screw on the opposite side. in a safe location. 3 Pull the hard drive out, and store the drive and screws 3 Pull the drive out of the drive cage. Slide the 4 To replace the hard drive, reverse these steps. Make sure the jumper on the new hard drive is in the CS (Cable Select) position. (See figure on page 51). 4 For the diskette drive, attach the screws: one on each side of the drive cage. (The screws for the 6-In-1 memory card reader are replaced when the drive cage is replaced.) 5 Replace the drive cage. (See page 53.) 54
-
 1
1 -
2
-
3
-
4
-
5
-
6
-
7
-
8
-
9
-
10
-
11
-
12
-
13
-
14
-
15
-
16
-
17
-
18
-
19
-
20
-
21
-
22
-
23
-
24
-
25
-
26
-
27
-
28
-
29
-
30
-
31
-
32
-
33
-
34
-
35
-
36
-
37
-
38
-
39
-
40
-
41
-
42
-
43
-
44
-
45
-
46
-
47
-
48
-
49
-
50
-
51
-
52
-
53
-
54
-
55
-
56
-
 57
57 -
 58
58 -
 59
59 -
 60
60 -
 61
61 -
 62
62 -
 63
63 -
 64
64 -
 65
65 -
 66
66 -
 67
67 -
68
-
69
-
70
-
71
-
72
-
73
-
74
-
75
-
76
-
77
-
78
-
79
-
80
-
81
-
82
 |
 |