HP N246v User Guide - Page 9
Front bezel controls, Control, Function
 |
View all HP N246v manuals
Add to My Manuals
Save this manual to your list of manuals |
Page 9 highlights
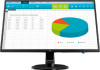
Front bezel controls Depending on your monitor model, the location of the front bezel controls will differ. 1 2 3 4 5 or 54.61 cm/21.5-inch model 12345 60.47 cm/23.8-inch model 54321 Control 1 Menu/OK 2 Minus 3 Plus 4 Exit 5 Power Function Opens the OSD menu or selects items on the OSD menu. If the OSD menu is on, press to navigate backward through the OSD menu and decrease adjustment levels. If the OSD menu is on, press to navigate forward through the OSD menu and increase adjustment levels. If the OSD menu is on, press to save any changes made, and exit the OSD menu. Turns the monitor on or off. NOTE: Button 2 to 4 can be assign different function by user. NOTE: To view an OSD menu simulator, visit the HP Customer Self Repair Services Media Library at http://www.hp.com/go/sml. 4 1 Getting Started
-
 1
1 -
2
-
3
-
 4
4 -
 5
5 -
 6
6 -
 7
7 -
 8
8 -
 9
9 -
 10
10 -
 11
11 -
 12
12 -
 13
13 -
 14
14 -
15
-
16
-
17
-
18
-
19
-
20
-
21
-
22
-
23
-
24
-
25
-
26
 |
 |
