HP Officejet 700 HP OfficeJet 700 Series All-in-One - (English) User Guide - Page 18
Using the image viewer
 |
View all HP Officejet 700 manuals
Add to My Manuals
Save this manual to your list of manuals |
Page 18 highlights
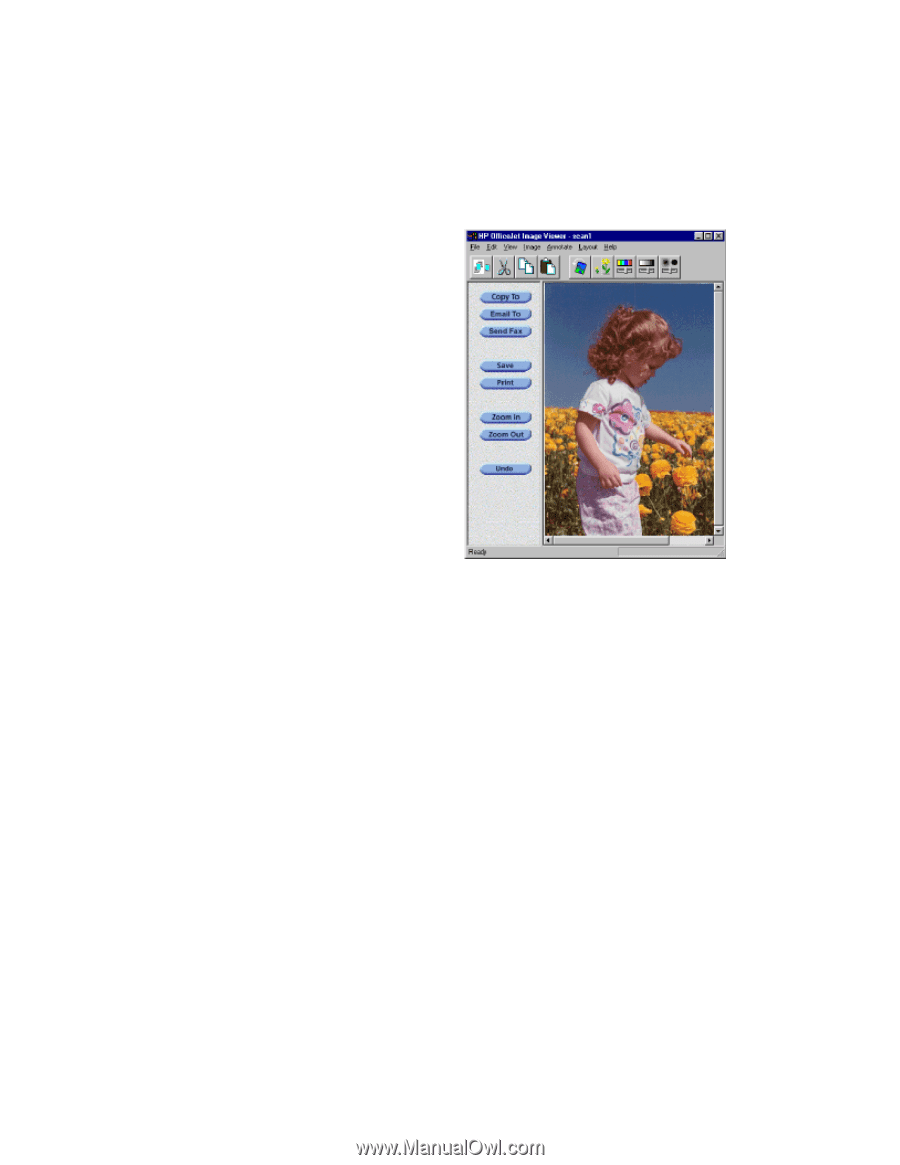
Using the image viewer When you scan a document or photo, the scanned image appears in the HP OfficeJet Image Viewer. Use the Image Viewer to edit, print, or save an image, or to copy it to another application. Selecting the area you want to edit Most of the tools in the Image Viewer affect the selected area of the image. With no area selected, the entire image is affected. l To select an area, press the left mouse button and hold it as you drag across the part of the image you want to select. Release the mouse button and the selected area has a dashed line around it. l To deselect the area, click anywhere in the image. The dashed line disappears, indicating that the entire image is selected. Editing images with the image viewer Use the Image Viewer to edit your image in the following ways: l cut l crop l adjust color l copy l resize l adjust brightness l paste l rotate image l sharpen image For a description of each of these editing features and how to use them, click Help in the menu bar of the Image Viewer, then click Help Topics for a list of tools. ...1-14
-
 1
1 -
2
-
3
-
4
-
5
-
6
-
7
-
8
-
9
-
10
-
11
-
12
-
 13
13 -
 14
14 -
 15
15 -
 16
16 -
 17
17 -
 18
18 -
 19
19 -
 20
20 -
 21
21 -
 22
22 -
 23
23 -
24
-
25
-
26
-
27
-
28
-
29
-
30
-
31
-
32
-
33
-
34
-
35
-
36
-
37
-
38
-
39
-
40
 |
 |