HP Officejet 7400 Wired/Wireless Networking Guide - Page 8
Connect additional computers, Get HP support, Windows XP, Printers and Faxes
 |
View all HP Officejet 7400 manuals
Add to My Manuals
Save this manual to your list of manuals |
Page 8 highlights
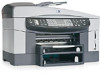
2 Connect your HP all-in-one, as described in Connect to a wireless network with an access point, Connect to a wireless network without an access point, or Connect with an Ethernet cable. 3 Install the software, as described in Install the software. 4 When the installation is complete, access the printer icons on your computer as follows: - For Windows XP: Open the Printers and Faxes folder. - For Windows 9.x or Windows 2000: Open the Printers folder. - For Macintosh OS X: Open the Printer Setup Utility in the Utilities list. 5 Check to see if the USB printer icon for your HP all-in-one is there. If it is, delete it. Connect additional computers If your HP all-in-one is connected to one of the recommended networks you can share your HP All-in-One with additional computers on the network. For each additional computer, you must install the HP all-in-one software, as described in Install the software. During installation, the software will discover the SSID (network name) of the existing network. Once you have set up your HP all-in-one on the network you will not need to configure it again when you add additional computers. Get HP support For information on how to get HP customer support, please see the printed User Guide that came with your HP all-in-one. HP all-in-one Network Guide 5
-
 1
1 -
2
-
 3
3 -
 4
4 -
 5
5 -
 6
6 -
 7
7 -
 8
8 -
 9
9 -
 10
10 -
 11
11 -
 12
12 -
 13
13 -
14
-
15
-
16
-
17
-
18
-
19
-
20
-
21
-
22
-
23
-
24
-
25
-
26
-
27
-
28
-
29
-
30
-
31
-
32
-
33
-
34
-
35
-
36
-
37
-
38
-
39
-
40
-
41
-
42
-
43
-
44
-
45
-
46
-
47
-
48
-
49
-
50
-
51
-
52
-
53
-
54
-
55
-
56
-
57
-
58
-
59
-
60
-
61
-
62
 |
 |