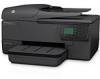
HP Officejet Pro 3620 Getting Started Guide - Page 5
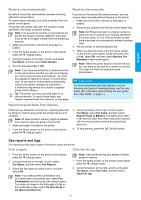
Use reports and logs
 |
View all HP Officejet Pro 3620 manuals
Add to My Manuals
Save this manual to your list of manuals |
Page 5 highlights
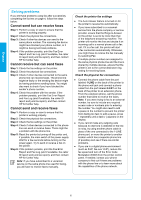
English Receive a fax automatically By default, the printer automatically answers incoming calls and receives faxes. To receive faxes manually, turn off Auto Answer from the printer control panel. The printer will answer calls after the number of rings specified in the Rings to Answer setting. Note: If an answering machine is connected to the printer, the Rings to Answer setting for the printer must be set to a higher number than the answering machine. 1. Make sure the printer is turned on and paper is loaded. 2. From the Home screen on the printer control panel, press the (Setup) button. 3. Using the buttons to the right, scroll to and select Fax Setup, and then select Auto Answer. 4. Scroll to and select On or Off. Note: If you have subscribed to a voicemail service on the same phone line that you will use for faxing, you cannot receive faxes automatically. You must be available to respond in person to incoming fax calls. (If you want to receive faxes automatically, contact your phone company to subscribe to a distinctive ring service or to obtain a separate phone line for faxing.) Tip: The printer can store received faxes in its internal memory. To reprint these faxes, see "Reprint received faxes from memory" on this page. Reprint received faxes from memory If Backup Fax Reception is turned on, incoming faxes will be stored in memory even when the printer has an error condition. Note: All faxes stored in memory might be deleted from memory when the printer is turned off. 1. Make sure paper is loaded in the printer. 2. From the Home screen on the printer control panel, press the (Setup) button. Receive a fax manually If you are on the phone with another person, you can receive faxes manually without hanging up the phone. 1. Make sure the printer is turned on and paper is loaded. 2. Remove any originals from the document feeder tray. Note: Set Rings to Answer to a higher number to allow you time to answer the incoming call before the printer does. Or turn off Auto Answer so that the printer does not automatically answer incoming calls. 3. Ask the sender to start sending the fax. 4. When you hear fax tones, from the Home screen on the printer control panel, press the button next to Fax, select OK, and then select Receive Fax Manually to start receiving fax. Note: When the printer begins to receive the fax, you can hang up the phone or remain on the line. You might not hear fax tones during fax transmission. Learn more! For more information about fax features, such as blocking junk faxes or forwarding faxes, see the user guide. (For information about finding the user guide, see "User Guide" on page 1.) 3. Using the buttons to the right, scroll to select Fax Setup, select Fax Tools, and then select Reprint Faxes in Memory. The faxes are printed in the reverse order from when they were received, with the most recently received fax printed first, and so on. 4. To stop printing, press the (Cancel) button. Use reports and logs Fax reports provide useful system information about the printer. Print a report Clear the fax log 1. From the Home screen on the printer control panel, press the (Setup) button. 2. Using the buttons to the right, scroll to select Fax Setup, and then select Fax Reports. 3. Select the fax report you want to print, and then select OK. Note: If you need printed confirmation that your faxes were successfully sent, select Fax Confirmation and then select the desired option. To include an image on the first page of a fax on the confirmation page, select On (Fax Send) or On (Send and Receive). Note: Clearing the fax log also deletes all faxes stored in memory. 1. From the Home screen on the printer control panel, press the (Setup) button. 2. Using the buttons to the right, scroll to and select Fax Setup, select Fax Tools, and then select Clear Fax log. 5
-
 1
1 -
 2
2 -
 3
3 -
 4
4 -
 5
5 -
 6
6 -
 7
7 -
 8
8 -
 9
9 -
 10
10 -
 11
11 -
12
-
13
-
14
-
15
-
16
 |
 |
