HP OmniBook xt1500-id HP Pavilion zt1100/xz200 Series and HP Omnibook xt1500 N - Page 125
Recovery CDs or DVDs
 |
View all HP OmniBook xt1500-id manuals
Add to My Manuals
Save this manual to your list of manuals |
Page 125 highlights
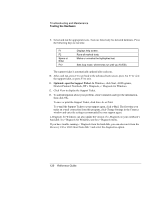
Troubleshooting and Maintenance Reinstalling and Updating Software Note 5. When the HP logo appears, press Esc to display the Boot menu. 6. Use the arrow keys to select the DVD/CD-RW drive as the boot device, and press Enter. 7. When the Recovery CD or DVD dialog box appears, follow the displayed instructions. If prompted, accept the recommended partition size. If you install the factory software, the recovery process can take up to 15 minutes. If you want to create the Utility partition without installing the factory software, click Advanced and select not to install the operating system. If your hard disk is partitioned into several drives, you can install the factory software on drive C without affecting other drives. Click Advanced and select to restore only the C partition. 8. Important: when prompted to reboot the notebook, press Ctrl+Alt+Del and follow any instructions that appear. You can find more details about recovering the factory installation of Windows on the Recovery CDs or DVDs: the file readme.txt is in the root directory of each disk. Windows XP supports the NTFS file system. To replace damaged Recovery CDs or DVDs If you lose or damage the Recovery CDs or DVDs, call the HP Customer Care Center for information about obtaining replacements. See "To contact HP for support or service" on page 129. Reference Guide 125
-
 1
1 -
2
-
3
-
4
-
5
-
6
-
7
-
8
-
9
-
10
-
11
-
12
-
13
-
14
-
15
-
16
-
17
-
18
-
19
-
20
-
21
-
22
-
23
-
24
-
25
-
26
-
27
-
28
-
29
-
30
-
31
-
32
-
33
-
34
-
35
-
36
-
37
-
38
-
39
-
40
-
41
-
42
-
43
-
44
-
45
-
46
-
47
-
48
-
49
-
50
-
51
-
52
-
53
-
54
-
55
-
56
-
57
-
58
-
59
-
60
-
61
-
62
-
63
-
64
-
65
-
66
-
67
-
68
-
69
-
70
-
71
-
72
-
73
-
74
-
75
-
76
-
77
-
78
-
79
-
80
-
81
-
82
-
83
-
84
-
85
-
86
-
87
-
88
-
89
-
90
-
91
-
92
-
93
-
94
-
95
-
96
-
97
-
98
-
99
-
100
-
101
-
102
-
103
-
104
-
105
-
106
-
107
-
108
-
109
-
110
-
111
-
112
-
113
-
114
-
115
-
116
-
117
-
118
-
119
-
 120
120 -
 121
121 -
 122
122 -
 123
123 -
 124
124 -
 125
125 -
 126
126 -
 127
127 -
 128
128 -
 129
129 -
 130
130 -
131
-
132
-
133
-
134
-
135
-
136
-
137
-
138
-
139
-
140
-
141
-
142
-
143
-
144
-
145
-
146
-
147
-
148
-
149
-
150
-
151
-
152
-
153
-
154
-
155
-
156
 |
 |
