HP P6000 HP StorageWorks disk enclosure VRM replacement instructions (504218-0 - Page 3
Installing the VRM, chassis and top of the power supply cage.
 |
View all HP P6000 manuals
Add to My Manuals
Save this manual to your list of manuals |
Page 3 highlights
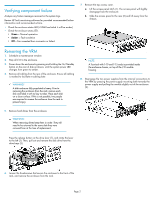
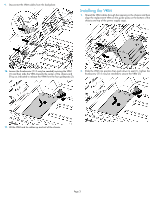
9. Disconnect the VRM cables from the backplane. Installing the VRM 1. Thread the VRM cables through the opening in the chassis and then align the replacement VRM on the guide posts on the bottom of the chassis and top of the power supply cage. 10. Loosen the thumbscrew (T-15 may be needed) securing the VRM (1) and then slide the VRM towards the center of the chassis and lift up as indicated to release the VRM from the four guideposts (2). 2. Slide the VRM into position then push down to seat (1), tighten the thumbscrew (T-15 may be needed) to secure the VRM (2). 11. Lift the VRM and its cables up and out of the chassis. Page 3
-
 1
1 -
 2
2 -
 3
3 -
 4
4
 |
 |
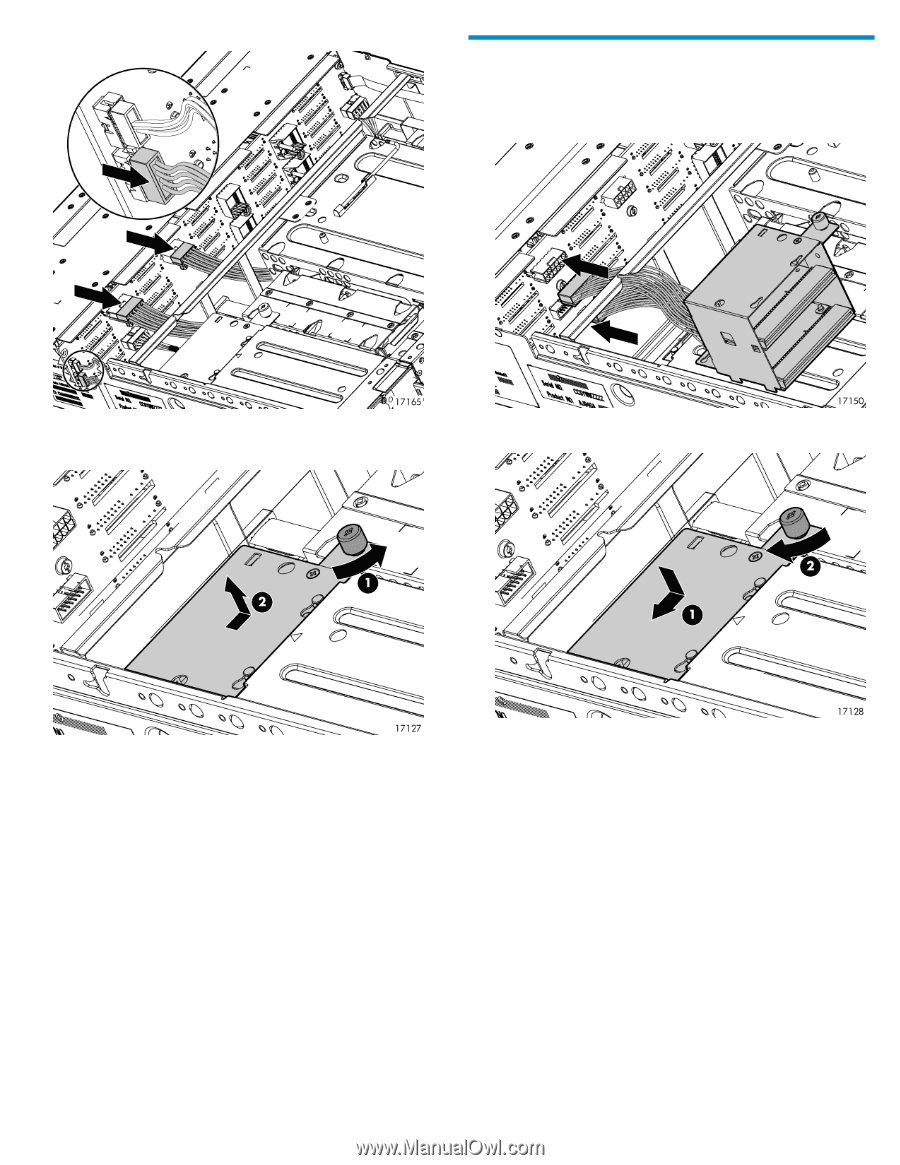
9.
Disconnect the VRM cables from the backplane.
10.
Loosen the thumbscrew (T-15 may be needed) securing the VRM
(1) and then slide the VRM towards the center of the chassis and
lift up as indicated to release the VRM from the four guideposts (2).
11.
Lift the VRM and its cables up and out of the chassis.
Installing the VRM
1.
Thread the VRM cables through the opening in the chassis and then
align the replacement VRM on the guide posts on the bottom of the
chassis and top of the power supply cage.
2.
Slide the VRM into position then push down to seat (1), tighten the
thumbscrew (T-15 may be needed) to secure the VRM (2).
Page 3