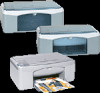
HP PSC 1200 HP PSC 1100/1200 series all-in-one - (English) Reference Guide - Page 9
for macintosh users, HP Photo and Imaging Director, Select Device, Settings, Status, Scan Picture - how to scan
 |
View all HP PSC 1200 manuals
Add to My Manuals
Save this manual to your list of manuals |
Page 9 highlights
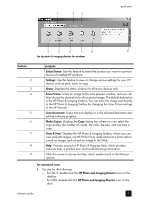
1 2 3 quick start 4 5 6 7 8 9 the hp photo & imaging director for windows feature 1 2 3 4 5 6 7 8 9 purpose Select Device: Use this feature to select the product you want to use from the list of installed HP products. Settings: Use this feature to view or change various settings for your HP device, such as print, scan, or copy. Status: Displays the status window for all-in-one devices only. Scan Picture: Scans an image to the scan preview window, and you can then choose the destination for the scanned image. The default destination is the HP Photo & Imaging Gallery. You can have the image sent directly to the HP Photo & Imaging Gallery by changing the Scan Picture settings in the HP Director. Scan Document: Scans text and displays it in the selected destination text editing software program. Make Copies: Displays the Copy dialog box where you can select the copy quality, the number of copies, the color, the size, and can start a copy. View & Print: Displays the HP Photo & Imaging Gallery, where you can view and edit images, use HP Photo Prints, make and print a photo album, e-mail an image, and unload an image to the Web. Help: Provides access to HP Photo & Imaging Help, which provides software help, a product tour, and troubleshooting information. Click this arrow to access tool tips, which explain each of the Director options. for macintosh users ! Do one for the following: - For OS 9, double-click the HP Photo and Imaging Director icon on the desktop. - For OSX, double-click the HP Photo and Imaging Director icon on the dock. reference guide 5
-
 1
1 -
2
-
3
-
 4
4 -
 5
5 -
 6
6 -
 7
7 -
 8
8 -
 9
9 -
 10
10 -
 11
11 -
 12
12 -
 13
13 -
 14
14 -
15
-
16
-
17
-
18
-
19
-
20
-
21
-
22
-
23
-
24
-
25
-
26
-
27
-
28
-
29
-
30
-
31
-
32
-
33
-
34
-
35
-
36
-
37
-
38
-
39
-
40
-
41
-
42
-
43
-
44
-
45
-
46
-
47
-
48
 |
 |
