HP PSC 2150 HP PSC 2100 Series all-in-one - (English) Reference Guide - Page 52
prepare your unit for shipment, call in the U.S., during warranty - drivers
 |
View all HP PSC 2150 manuals
Add to My Manuals
Save this manual to your list of manuals |
Page 52 highlights
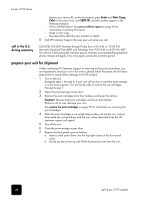
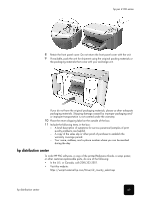
hp psc 2100 series display your service ID, on the front panel, press Enter and Start Copy, Color at the same time, until SERV ID: and the number appear in the front-panel display - Print a Self-Test Report. See print a self-test report on page 26 for information on printing this report. - Make a color copy. - Be prepared to describe your problem in detail. 5 Call HP Customer Support. Be near your unit when you call. call in the U.S. during warranty Call (208) 323-2551 Monday through Friday from 6:00 A.M. to 10:00 P.M. Mountain Standard Time (MST) and Saturdays from 9:00 A.M. to 4:00 P.M. MST. This service is free during the warranty period; however, your standard long-distance phone charges still apply. A fee may apply outside the warranty period. prepare your unit for shipment If after contacting HP Customer Support or returning to the point of purchase, you are requested to send your unit in for service, please follow the power off and rebox steps below to avoid further damage to the HP product. 1 Turn on the unit. Disregard steps 1 through 6, if your unit will not turn on and the print carriage is in the home position. You will not be able to remove the ink cartridges. Proceed to step 7. 2 Open the print-carriage access door. 3 Remove the print cartridges from their holders, and lower the latches. Caution! Remove both print cartridges and lower both latches. Failure to do so may damage your unit. See replace the print cartridges on page 27 for information on removing the print cartridges. 4 Place the print cartridges in an airtight bag so they will not dry out, and put them aside (do not send them with the unit, unless instructed to by the HP customer support call agent). 5 Turn off the unit. 6 Close the print-carriage access door. 7 Remove the front panel cover as follows: a. Insert a small screw driver into the top right corner of the front panel cover. b. Gently pry the corner up and lift the front panel cover from the unit. 48 get hp psc 2100 support
-
 1
1 -
2
-
3
-
4
-
5
-
6
-
7
-
8
-
9
-
10
-
11
-
12
-
13
-
14
-
15
-
16
-
17
-
18
-
19
-
20
-
21
-
22
-
23
-
24
-
25
-
26
-
27
-
28
-
29
-
30
-
31
-
32
-
33
-
34
-
35
-
36
-
37
-
38
-
39
-
40
-
41
-
42
-
43
-
44
-
45
-
46
-
 47
47 -
 48
48 -
 49
49 -
 50
50 -
 51
51 -
 52
52 -
 53
53 -
 54
54 -
 55
55 -
 56
56 -
 57
57 -
58
-
59
-
60
-
61
-
62
-
63
-
64
 |
 |
