HP Pavilion 11-e100 210 G1 Notebook PC Pavilion 11 Notebook PC Pavilion TouchS - Page 65
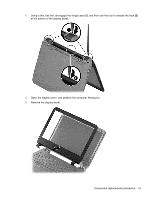
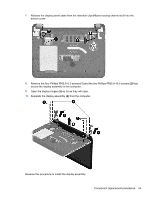
Separate the display assembly, as far as they will open.
 |
View all HP Pavilion 11-e100 manuals
Add to My Manuals
Save this manual to your list of manuals |
Page 65 highlights
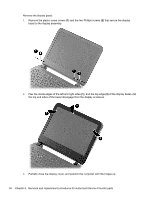
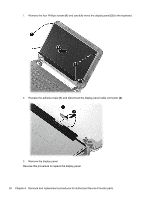
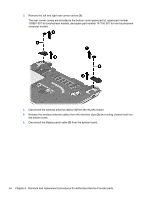
7. Release the display panel cable from the retention clips (4) and routing channel built into the bottom cover. 8. Remove the four Phillips PM2.0×5.5 screws (1) and the two Phillips PM2.5×10.5 screws (2) that secure the display assembly to the computer. 9. Open the display hinges (3) as far as they will open. 10. Separate the display assembly (4) from the computer. Reverse this procedure to install the display assembly. Component replacement procedures 55
-
 1
1 -
2
-
3
-
4
-
5
-
6
-
7
-
8
-
9
-
10
-
11
-
12
-
13
-
14
-
15
-
16
-
17
-
18
-
19
-
20
-
21
-
22
-
23
-
24
-
25
-
26
-
27
-
28
-
29
-
30
-
31
-
32
-
33
-
34
-
35
-
36
-
37
-
38
-
39
-
40
-
41
-
42
-
43
-
44
-
45
-
46
-
47
-
48
-
49
-
50
-
51
-
52
-
53
-
54
-
55
-
56
-
57
-
58
-
59
-
 60
60 -
 61
61 -
 62
62 -
 63
63 -
 64
64 -
 65
65 -
 66
66 -
 67
67 -
 68
68 -
 69
69 -
 70
70 -
71
-
72
-
73
-
74
-
75
-
76
-
77
-
78
-
79
-
80
-
81
-
82
-
83
-
84
-
85
-
86
-
87
-
88
-
89
-
90
-
91
-
92
-
93
-
94
-
95
-
96
-
97
-
98
-
99
-
100
-
101
-
102
-
103
-
104
-
105
-
106
-
107
-
108
-
109
-
110
-
111
 |
 |
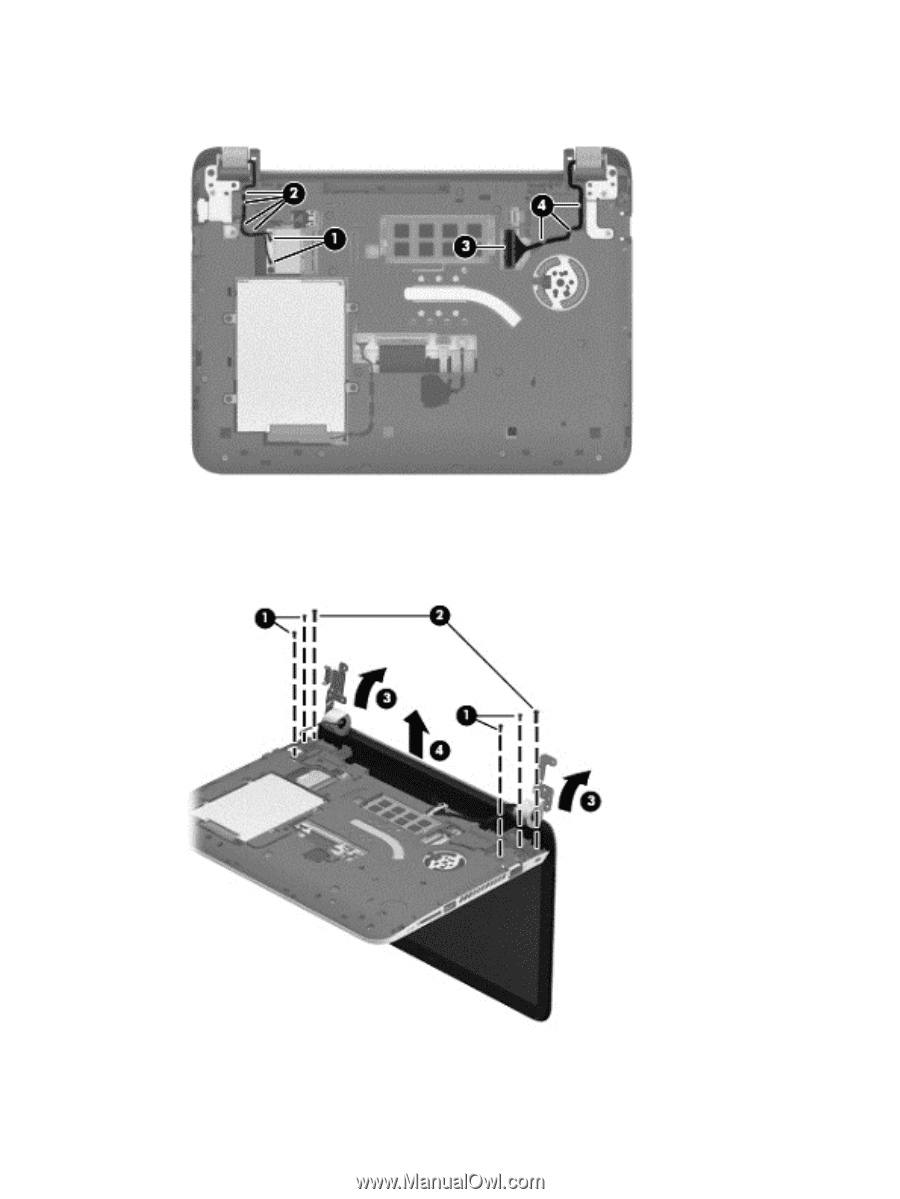
7.
Release the display panel cable from the retention clips
(4)
and routing channel built into the
bottom cover.
8.
Remove the four Phillips PM2.0×5.5 screws
(1)
and the two Phillips PM2.5×10.5 screws
(2)
that
secure the display assembly to the computer.
9.
Open the display hinges
(3)
as far as they will open.
10.
Separate the display assembly
(4)
from the computer.
Reverse this procedure to install the display assembly.
Component replacement procedures
55