HP Pavilion 14-b130us HP Pavilion TouchSmart 14 Ultrabook HP Pavilion TouchSma - Page 81
Heat sink, Remove the WLAN see
 |
View all HP Pavilion 14-b130us manuals
Add to My Manuals
Save this manual to your list of manuals |
Page 81 highlights
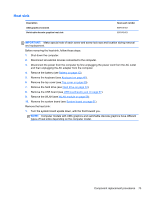
Heat sink Description UMA graphics heat sink Switchable discrete graphics heat sink Spare part number 697915-001 697916-001 IMPORTANT: Make special note of each screw and screw lock size and location during removal and replacement. Before removing the heat sink, follow these steps: 1. Shut down the computer. 2. Disconnect all external devices connected to the computer. 3. Disconnect the power from the computer by first unplugging the power cord from the AC outlet and then unplugging the AC adapter from the computer. 4. Remove the battery (see Battery on page 42). 5. Remove the keyboard (see Keyboard on page 46). 6. Remove the top cover (see Top cover on page 50). 7. Remove the hard drive (see Hard drive on page 54). 8. Remove the USB board (see USB board/audio jack on page 57). 9. Remove the WLAN (see WLAN module on page 58). 10. Remove the system board (see System board on page 61). Remove the heat sink: 1. Turn the system board upside down, with the front toward you. NOTE: Computer models with UMA graphics and switchable discrete graphics have different types of heat sinks depending on the computer model. Component replacement procedures 73
-
 1
1 -
2
-
3
-
4
-
5
-
6
-
7
-
8
-
9
-
10
-
11
-
12
-
13
-
14
-
15
-
16
-
17
-
18
-
19
-
20
-
21
-
22
-
23
-
24
-
25
-
26
-
27
-
28
-
29
-
30
-
31
-
32
-
33
-
34
-
35
-
36
-
37
-
38
-
39
-
40
-
41
-
42
-
43
-
44
-
45
-
46
-
47
-
48
-
49
-
50
-
51
-
52
-
53
-
54
-
55
-
56
-
57
-
58
-
59
-
60
-
61
-
62
-
63
-
64
-
65
-
66
-
67
-
68
-
69
-
70
-
71
-
72
-
73
-
74
-
75
-
 76
76 -
 77
77 -
 78
78 -
 79
79 -
 80
80 -
 81
81 -
 82
82 -
 83
83 -
 84
84 -
 85
85 -
 86
86 -
87
-
88
-
89
-
90
-
91
-
92
-
93
-
94
-
95
-
96
-
97
-
98
-
99
-
100
-
101
-
102
-
103
-
104
-
105
-
106
-
107
-
108
-
109
-
110
-
111
-
112
-
113
-
114
-
115
-
116
-
117
-
118
-
119
 |
 |
