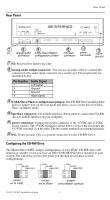
HP Pavilion 7700 HP Pavilion PC's - (English) TEAC CD-W58E CD-Rewritable Drive - Page 4
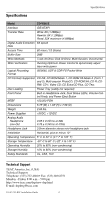
Installing the CD-RW Drive, Touch the exposed metal frame of the computer to ground yourself. - specification
 |
View all HP Pavilion 7700 manuals
Add to My Manuals
Save this manual to your list of manuals |
Page 4 highlights
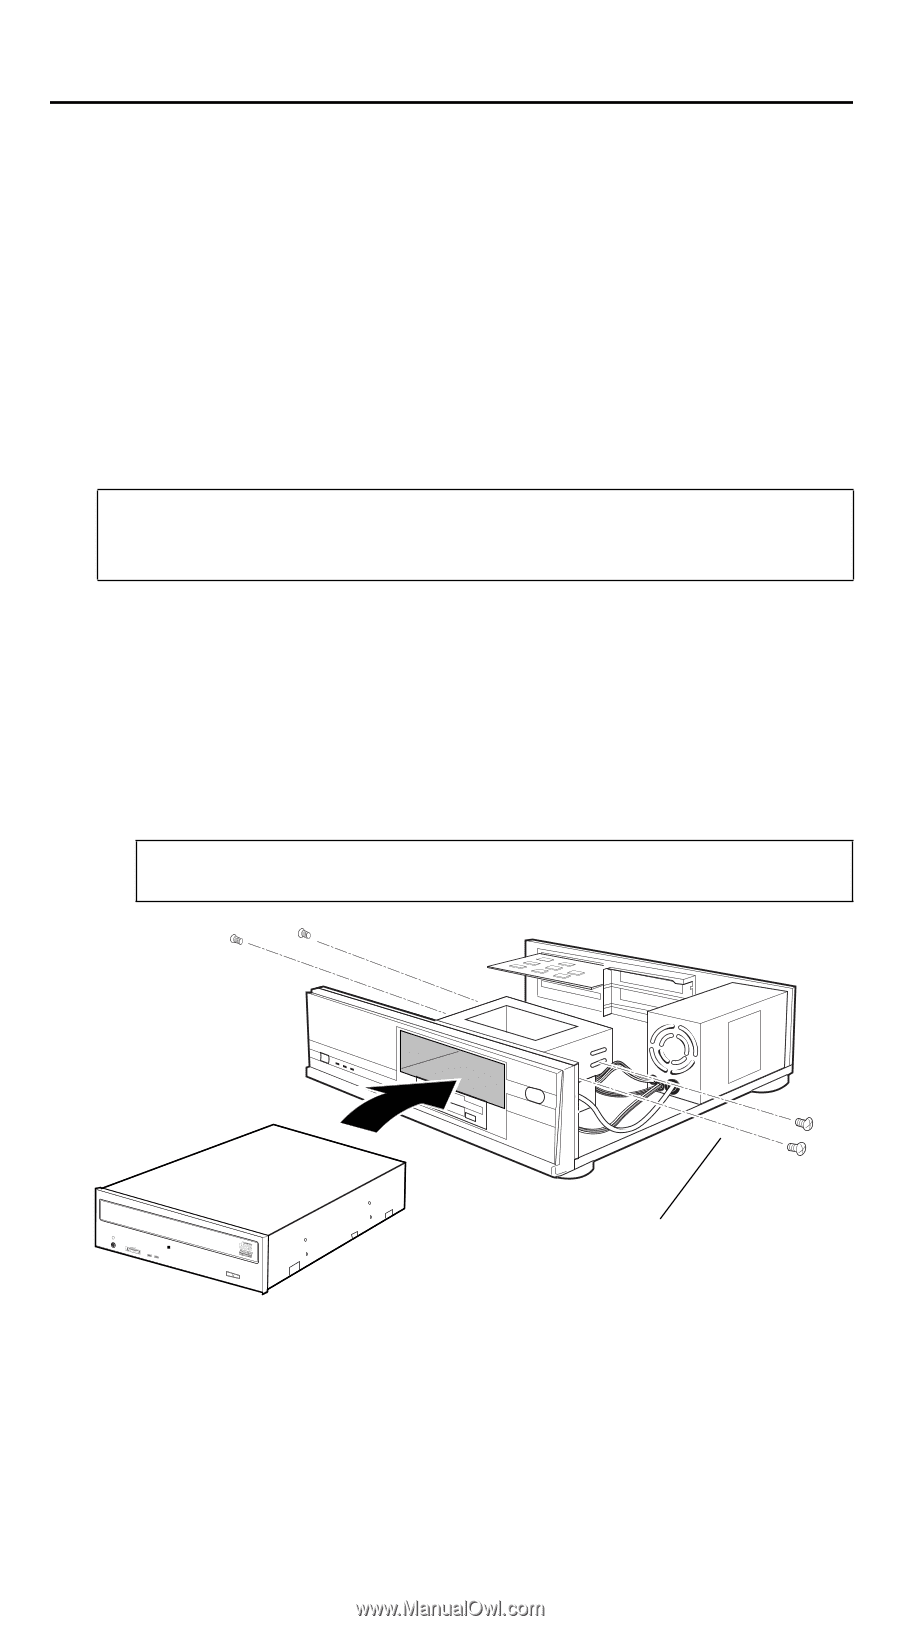
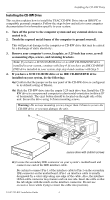
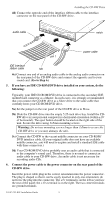
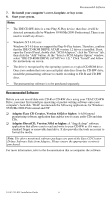
Installing the CD-RW Drive Installing the CD-RW Drive This section explains how to install the TEAC CD-RW Drive into an IBM PC or compatible personal computer. Follow the steps below and refer to your computer documentation for information specific to your system. 1. Turn off the power to the computer system and any external devices connected to it. 2. Touch the exposed metal frame of the computer to ground yourself. This will prevent damage to the computer or CD-RW drive that may be caused by a discharge of static electricity. 3. Remove your computer's cover, faceplate, or 5.25-inch bay cover, as well as mounting clips, screws, and retaining brackets. Note: If you have a SCSI CD-ROM drive or no IDE CD-ROM/DVD drive installed in your system, continue with Step 4. If you have an IDE CD-ROM/ DVD drive installed in your system, skip step 4 and continue with Step 5. 4. If you have a SCSI CD-ROM drive or no IDE CD-ROM/DVD drive installed on your system, do the following: 4a) Confirm that the jumper on the rear panel of the CD-RW drive is configured to its default setting of Master. 4b) Slide the CD-RW drive into the empty 5.25-inch drive bay. Install the CDRW drive in your personal computer in a horizontal orientation (within ±10˚ of horizontal). The eject button should be located on the right side of the unit. Secure the drive using 3x5mm mounting screws. Warning: Do not use mounting screws longer than 3x5mm to secure the CD-RW drive or you may damage the unit. secure drive with 3x5mm screws 4c) Locate the secondary IDE connector on your system's motherboard and connect one end of the IDE interface cable. Be certain to connect Pin-1 of the interface cable to Pin-1 on the secondary IDE connector on the motherboard. (Pin-1 on interface cable is usually designated by a color strip along one edge of the cable. Also, the interface ribbon cable connector may feature a tab on one side. Insert the cable so that the tab aligns with the notch on the interface connector. Do not use excessive force while trying to insert the cable into position). TEAC CD-RW Installation Guide 4
-
 1
1 -
 2
2 -
 3
3 -
 4
4 -
 5
5 -
 6
6 -
 7
7 -
 8
8
 |
 |