HP Pavilion 7700 HP Pavilion PC's - (English) TEAC CD-W58E CD-Rewritable Drive - Page 5
Go to Step 6., Connect the power cable to the power connector on the rear panel of - motherboard
 |
View all HP Pavilion 7700 manuals
Add to My Manuals
Save this manual to your list of manuals |
Page 5 highlights
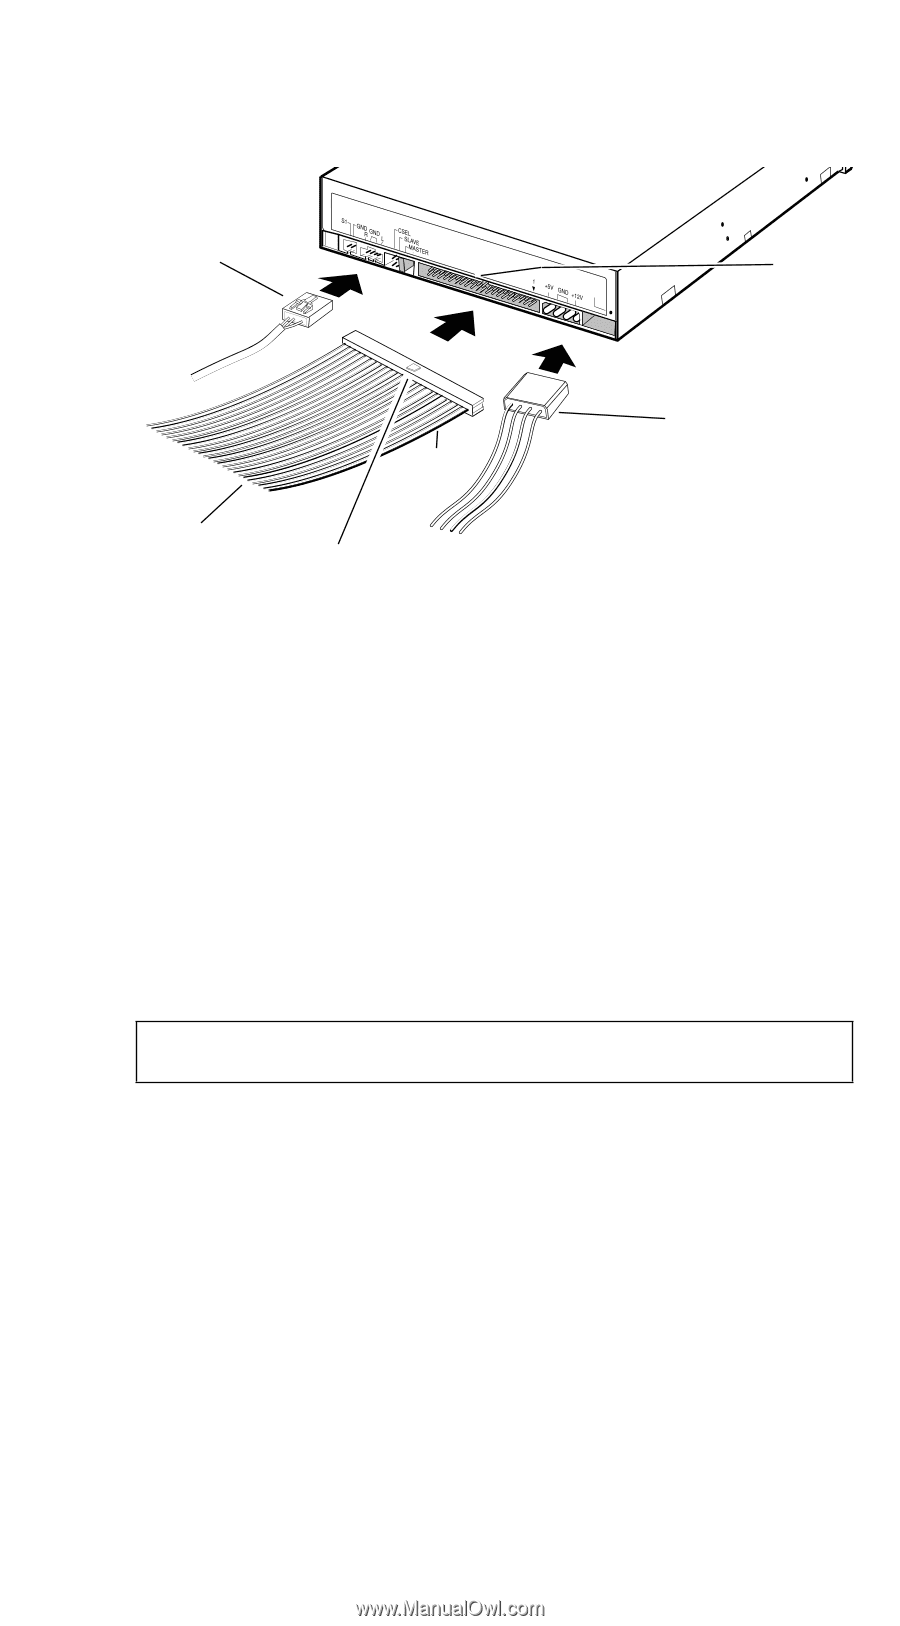
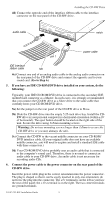
Installing the CD-RW Drive 4d) Connect the opposite end of the interface ribbon cable to the interface connector on the rear panel of the CD-RW drive. audio cable AUDIO OUT IDE INTERFACE DC INPUT FG notch pin 1 power cable IDE interface ribbon cable tab 4e) Connect one end of an analog audio cable to the analog audio connector on the rear panel of the CD-RW drive and connect the opposite end to your sound card. (Go to Step 6.) 5. If you have an IDE CD-ROM/DVD drive installed on your system, do the following: Typically, your IDE CD-ROM/DVD drive is connected to the secondary IDE motherboard connector as a Master. In such cases, it is strongly recommended that you connect the CD-RW drive as a Slave drive to the same cable that currently hosts your CD-ROM/DVD drive. 5a) Set the jumper on the rear panel of the CD-RW drive to Slave. 5b) Slide the CD-RW drive into the empty 5.25-inch drive bay. Install the CDRW drive in your personal computer in a horizontal orientation (within ±10˚ of horizontal). The eject button should be located on the right side of the unit. Secure the drive using 3x5mm mounting screws. Warning: Do not use mounting screws longer than 3x5mm to secure the CD-RW drive or you may damage the unit. 5c) Connect the CD-RW to the vacant middle connector on your CD-ROM/ DVD interface cable. (If your original cable does not have an available middle connector, you will need to acquire and install a standard IDE cable with three connectors.) 5d) Your CD-ROM/DVD drive probably uses an audio cable that is connected to the computer's sound card. Therefore, there is no need to connect an audio cable to your CD-RW drive. An audio cable is not necessary for recording audio CDs. 6. Connect the power cable to the power connector on the rear panel of the CD-RW drive. Insert the power cable plug in the correct orientation into the power connector. The plug is shaped so that it can be easily inserted in only one orientation; do not force the plug into the connector. The +5v terminal is on the left as you face the rear of the panel; the +12v terminal is on the right. The two center terminals are ground terminals. TEAC CD-RW Installation Guide 5
-
 1
1 -
 2
2 -
 3
3 -
 4
4 -
 5
5 -
 6
6 -
 7
7 -
 8
8
 |
 |