HP Pavilion Slimline s7400 Upgrading and Servicing Guide - Page 10
Removing and Replacing an Optical Disc Drive, Before You Begin, Removing an Optical Disc Drive - driver
 |
View all HP Pavilion Slimline s7400 manuals
Add to My Manuals
Save this manual to your list of manuals |
Page 10 highlights
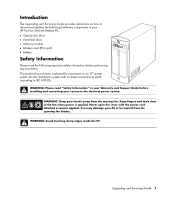
Removing and Replacing an Optical Disc Drive Your PC includes an optical disc drive that you can replace or upgrade. See "Locating Components Inside the PC" on page 4. Before You Begin Observe the following requirements before removing and replacing the component: IMPORTANT: Due to the small PC size, you can only install an optical disc drive of less than the approximate length of 170 mm (6.7 inches). IMPORTANT: Before installing a new optical disc drive, make sure that it is compatible with the Microsoft ® Windows® XP operating system. Also, make sure you have the correct software and drivers for the optical drive to work with the operating system. Optical disc drive The optical disc drive may be either a PATA (parallel advanced technology attachment) drive or SATA (serial advanced technology attachment) drive that uses a narrow data cable with an optional latch. This procedure requires a Phillips screwdriver. Removing an Optical Disc Drive 1 Prepare the PC and remove the PC cover. Complete the "Opening the PC" procedures on page 2. 2 Remove the fan assembly: a Lift the fan assembly upward at the arrows shown (A). b Lift out the fan assembly (B). c Disconnect the fan power cable by grasping the connector and pulling up (C). IMPORTANT: Make a note of the fan power cable routing before removing the cable. 3 Make a note of each cable and plug orientation attached to the back of the optical disc drive before removing the cables. 6 Upgrading and Servicing Guide
-
 1
1 -
2
-
3
-
4
-
 5
5 -
 6
6 -
 7
7 -
 8
8 -
 9
9 -
 10
10 -
 11
11 -
 12
12 -
 13
13 -
 14
14 -
 15
15 -
16
-
17
-
18
-
19
-
20
-
21
-
22
-
23
-
24
 |
 |
