HP Pavilion Slimline s7400 Upgrading and Servicing Guide - Page 12
Replacing an Optical Disc Drive, Complete the procedure Removing an Optical Disc Drive
 |
View all HP Pavilion Slimline s7400 manuals
Add to My Manuals
Save this manual to your list of manuals |
Page 12 highlights
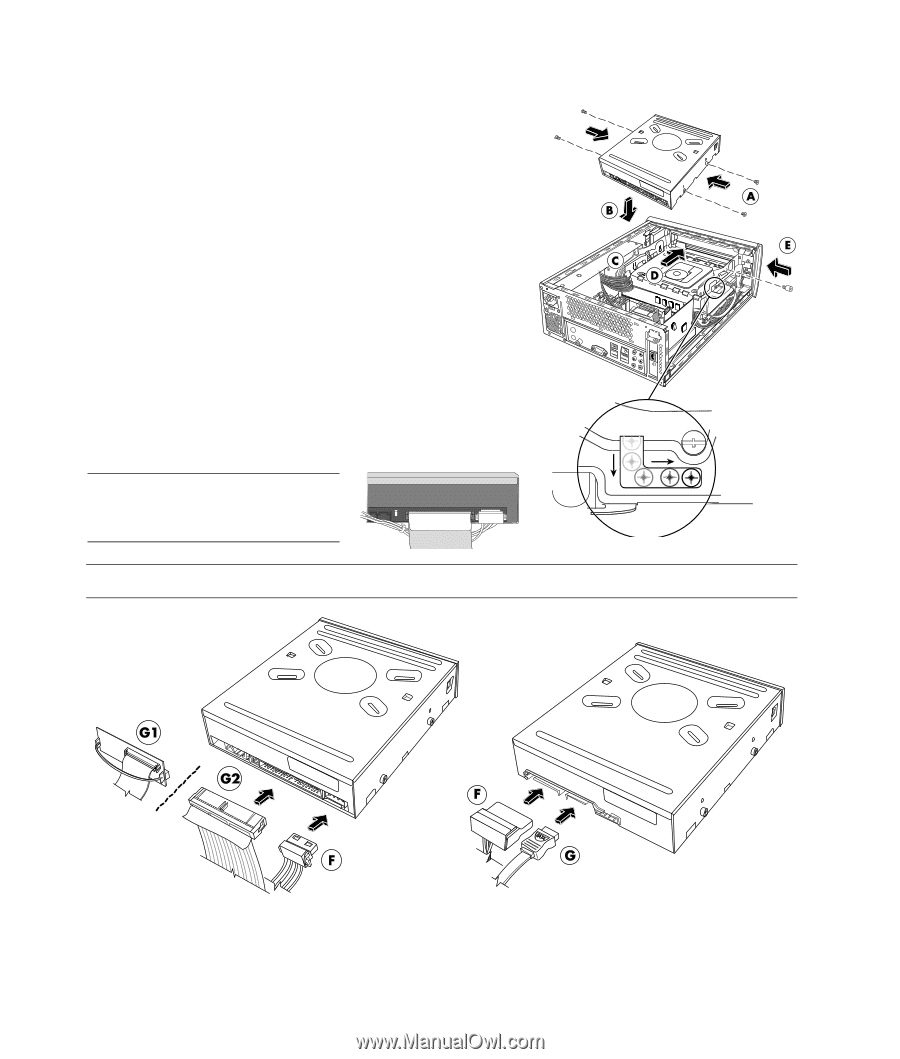
Replacing an Optical Disc Drive 1 Complete the procedure "Removing an Optical Disc Drive" on page 6. 2 Screw all four guide screws into the sides of the new optical disc drive (A). 3 Gently lower the new optical disc drive into the tray (B). 4 Hold the power supply cables against the power supply to clear the optical disc drive (C) (as required) and slide the drive 2 cm (3/4 inch) to the front of the PC (D). 5 Insert the thumbscrew on the side of the optical disc drive (E). 6 Connect the power cable (F) and data cable (G) firmly to the back of the optical disc drive. Ensure that the cables are completely inserted. The optical drive model may have PATA cables or SATA cables that use narrow data cables. • SATA cables may include a latch. • The PATA data cable may be a thin ribbon cable (G1) or a thicker ribbon cable (G2). The thin ribbon cable is attached to a connector with a pull handle. NOTE: Route the PATA power cable under the data cable to prevent interference with the fan. CAUTION: Do not disconnect the PATA thin ribbon cable from the data cable connector. PATA optical disc drive - attach (F) and (G1) or (G2) SATA optical disc drive 8 Upgrading and Servicing Guide
-
 1
1 -
2
-
3
-
4
-
5
-
6
-
 7
7 -
 8
8 -
 9
9 -
 10
10 -
 11
11 -
 12
12 -
 13
13 -
 14
14 -
 15
15 -
 16
16 -
 17
17 -
18
-
19
-
20
-
21
-
22
-
23
-
24
 |
 |