HP Photosmart 6510 Reference Guide - Page 4
Setup and troubleshooting - software
 |
View all HP Photosmart 6510 manuals
Add to My Manuals
Save this manual to your list of manuals |
Page 4 highlights
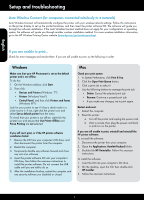
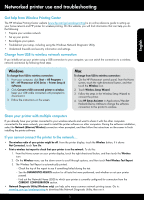
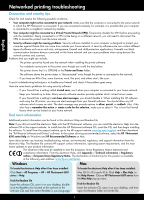
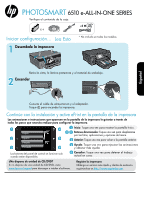
English Setup and troubleshooting Auto Wireless Connect (for computers connected wirelessly to a network) Auto Wireless Connect will automatically configure the printer with your wireless network settings. Follow the instructions on the printer display to set up the printer hardware, and then insert the printer software CD. The software will guide you through the software installation. If the Auto Wireless Connect method does not apply for your configuration or operating system, the software will guide you through another wireless installation method. For more wireless installation information, go to the HP Wireless Printing Center website (www.hp.com/go/wirelessprinting). If you are unable to print... Check for error messages and resolve them. If you are still unable to print, try the following in order: Windows Make sure that your HP Photosmart is set as the default printer and is not offline. To do this: 1. On the Windows taskbar, click Start. 2. Then click: •• Devices and Printers (Windows 7®) •• Printers (Windows Vista®) •• Control Panel, and then click Printers and Faxes (Windows XP®) Look for your printer to see if it has a check mark in a circle next to it. If not, right-click the printer icon and select Set as default printer from the menu. To check that your printer is not offline, right-click the printer icon and ensure that Use Printer Offline and Pause Printing are not selected. If you still can't print, or if the HP printer software installation failed: 1. Remove the CD from your computer's CD drive, and then disconnect the printer from the computer. 2. Restart the computer. 3. Temporarily disable any software firewall and close any anti-virus software. 4. Insert the printer software CD into your computer's CD drive, then follow the onscreen instructions to install the printer software. Do not connect the USB cable until you are told to do so. 5. After the installation finishes, restart the computer and any security software you disabled or closed. Mac Check your print queue: 1. In System Preferences, click Print & Fax. 2. Click the Open Print Queue button. 3. Click a print job to select it. 4. Use the following buttons to manage the print job: •• Delete: Cancel the selected print job. •• Resume: Continue a paused print job. •• If you made any changes, try to print again. Restart and reset: 1. Restart the computer. 2. Reset the printer: a. Turn off the printer and unplug the power cord. b. Wait a minute, then plug the power cord back in and turn on the printer. If you are still unable to print, uninstall and reinstall the HP printer software. To uninstall the software: 1. Disconnect the printer from your computer. 2. Open the Applications: Hewlett-Packard folder. 3. Double-click HP Uninstaller. Follow the onscreen instructions. To install the software: 1. Insert the CD into your computer's CD drive. 2. On the desktop, open the CD, then double-click HP Installer. 3. Follow the onscreen instructions. 4
-
 1
1 -
 2
2 -
 3
3 -
 4
4 -
 5
5 -
 6
6 -
 7
7 -
 8
8 -
 9
9 -
 10
10 -
11
-
12
-
13
-
14
-
15
-
16
-
17
-
18
-
19
-
20
-
21
-
22
-
23
-
24
 |
 |