HP Photosmart 7510 Reference Guide - Page 3
Features and tips - software
 |
View all HP Photosmart 7510 manuals
Add to My Manuals
Save this manual to your list of manuals |
Page 3 highlights
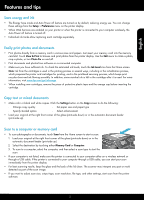
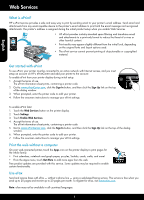
English Features and tips Save energy and ink •• The Energy Save mode and Auto Power off feature are turned on by default, reducing energy use. You can change these settings from the Setup > Preferences menu on the printer display. •• When Web Services are enabled on your printer or when the printer is connected to your computer wirelessly, the Auto Power off feature is turned off. •• Individual ink tanks allow replacing each cartridge separately. Easily print photos and documents •• Print photos directly from a memory card in various sizes and papers. Just insert your memory card into the memory card slot. Touch View & Print to browse and print photos from the printer display. Use the Edit menu to rotate a photo, crop a photo, or turn Photo Fix on and off. •• Print documents and photos from software on a connected computer. •• Make sure you have sufficient ink. To check the estimated ink levels, touch the Ink Level icon from the Home screen. Note: Ink from the cartridges is used in the printing process in several ways, including in the initialization process, which prepares the printer and cartridges for printing, and in the printhead servicing process, which keeps print nozzles clear and ink flowing smoothly. In addition, some residual ink is left in the cartridge after it is used. For more information, visit www.hp.com/go/inkusage. •• When installing new cartridges, remove the piece of protective plastic tape and the orange cap before inserting the cartridge. Copy text or mixed documents •• Make color or black and white copies. Click the Settings button on the Copy screen to do the following: - Change copy quality - Set paper size and paper type - Specify 2-sided option - Select enhancement •• Load your original at the right front corner of the glass (print-side down) or in the automatic document feeder (print-side up). Scan to a computer or memory card •• To scan photographs or documents, touch Scan from the Home screen to start a scan: 1. Load your original at the right front corner of the glass (print-side down) or in the automatic document feeder (print-side up). 2. Select the destination by touching either Memory Card or Computer. 3. To scan to a computer, select the computer, and then select a scan type to start the scan. •• If your computer is not listed, make sure the printer is connected to your computer either on a wireless network or through a USB cable. If the printer is connected to your computer through a USB cable, you can start your scan immediately from the printer display. •• For best scanning results, keep the glass and the back of the lid clean. The scanner may interpret any spot or mark detected as part of the scan image. •• If you want to adjust scan size, output type, scan resolution, file type, and other settings, start scan from the printer software. 3
-
 1
1 -
 2
2 -
 3
3 -
 4
4 -
 5
5 -
 6
6 -
 7
7 -
 8
8 -
 9
9 -
10
-
11
-
12
-
13
-
14
-
15
-
16
-
17
-
18
-
19
-
20
-
21
-
22
-
23
-
24
 |
 |