HP Photosmart A630 Basics Guide - Page 7
Control panel buttons and indicator lights, Use the touch screen - power cord
 |
View all HP Photosmart A630 manuals
Add to My Manuals
Save this manual to your list of manuals |
Page 7 highlights
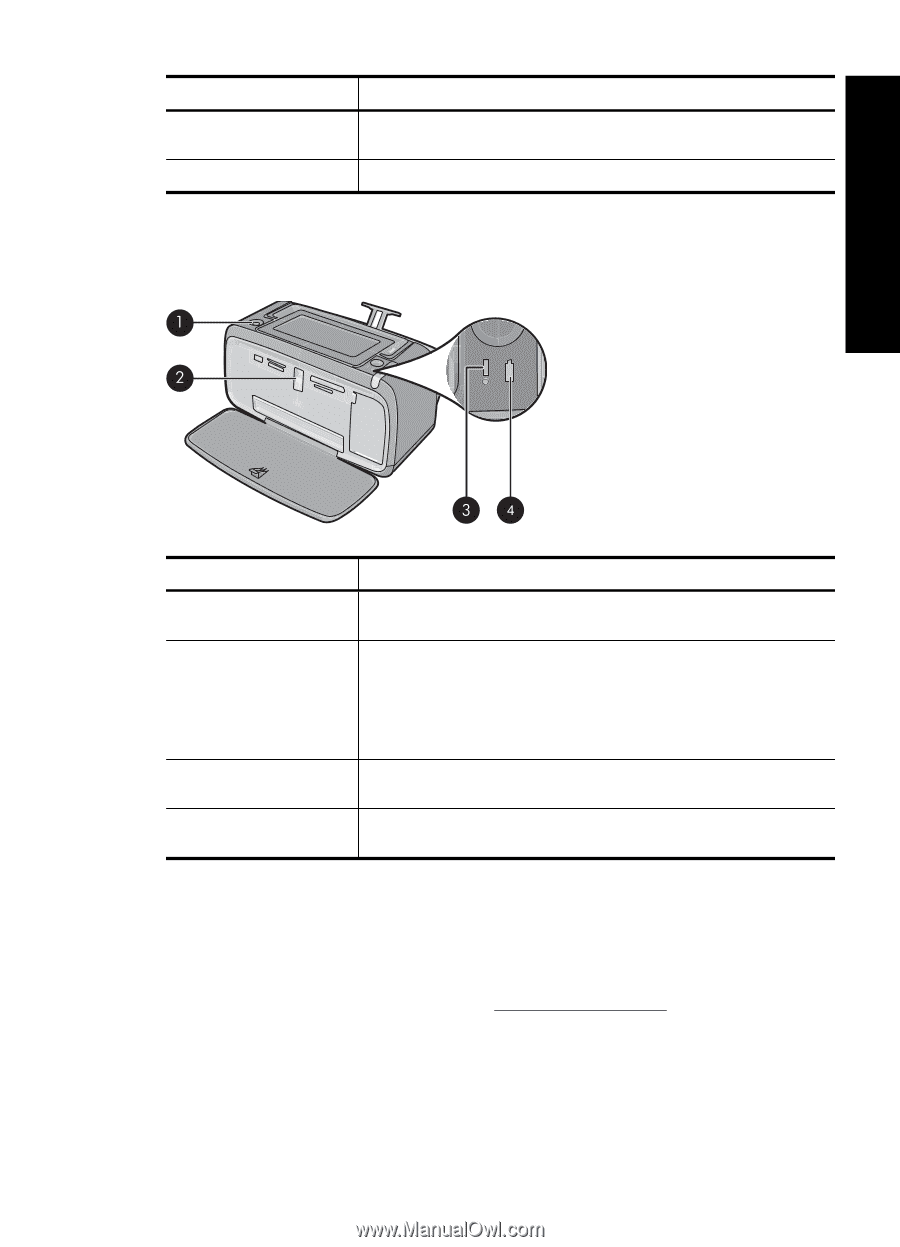
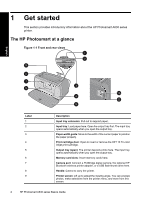
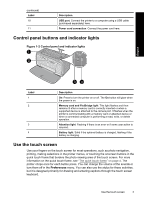
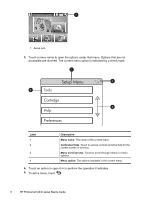
(continued) Label 10 11 Description USB port: Connect the printer to a computer using a USB cable (purchased separately) here. Power cord connection: Connect the power cord here. Control panel buttons and indicator lights Figure 1-2 Control panel and indicator lights English Label 1 2 3 4 Description On: Press to turn the printer on or off. The On button will glow when the power is on. Memory card and PictBridge light: This light flashes and then remains lit after a memory card is correctly inserted or when a supported device is attached to the camera port. It flashes when the printer is communicating with a memory card or attached device or when a connected computer is performing a read, write, or delete operation. Attention light: Flashing if there is an error or if some user action is required. Battery light: Solid if the optional battery is charged, flashing if the battery is charging. Use the touch screen Use your fingers on the touch screen for most operations, such as photo navigation, printing, making selections in the printer menus, or touching the onscreen buttons in the quick touch frame that borders the photo viewing area of the touch screen. For more information on the quick touch frame, see "The quick touch frame" on page 4. The printer chirps once for each button press. You can change the volume of the sounds or turn them off in the Preferences menu. You can also use the stylus for these activities, but it is designed primarily for drawing and entering captions through the touch screen keyboard. Use the touch screen 3
-
 1
1 -
 2
2 -
 3
3 -
 4
4 -
 5
5 -
 6
6 -
 7
7 -
 8
8 -
 9
9 -
 10
10 -
 11
11 -
 12
12 -
13
-
14
-
15
-
16
-
17
-
18
-
19
-
20
-
21
-
22
-
23
-
24
-
25
-
26
-
27
-
28
-
29
-
30
-
31
-
32
-
33
-
34
-
35
-
36
-
37
-
38
-
39
-
40
-
41
-
42
-
43
-
44
-
45
-
46
-
47
-
48
-
49
-
50
-
51
-
52
-
53
-
54
-
55
-
56
-
57
-
58
-
59
-
60
-
61
-
62
-
63
-
64
-
65
-
66
-
67
-
68
-
69
-
70
-
71
-
72
-
73
-
74
-
75
-
76
-
77
-
78
-
79
-
80
-
81
 |
 |