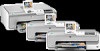
HP Photosmart D7400 Setup Guide
HP Photosmart D7400 Manual
 |
View all HP Photosmart D7400 manuals
Add to My Manuals
Save this manual to your list of manuals |
HP Photosmart D7400 manual content summary:
- HP Photosmart D7400 | Setup Guide - Page 1
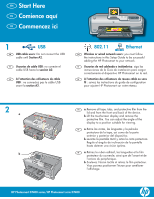
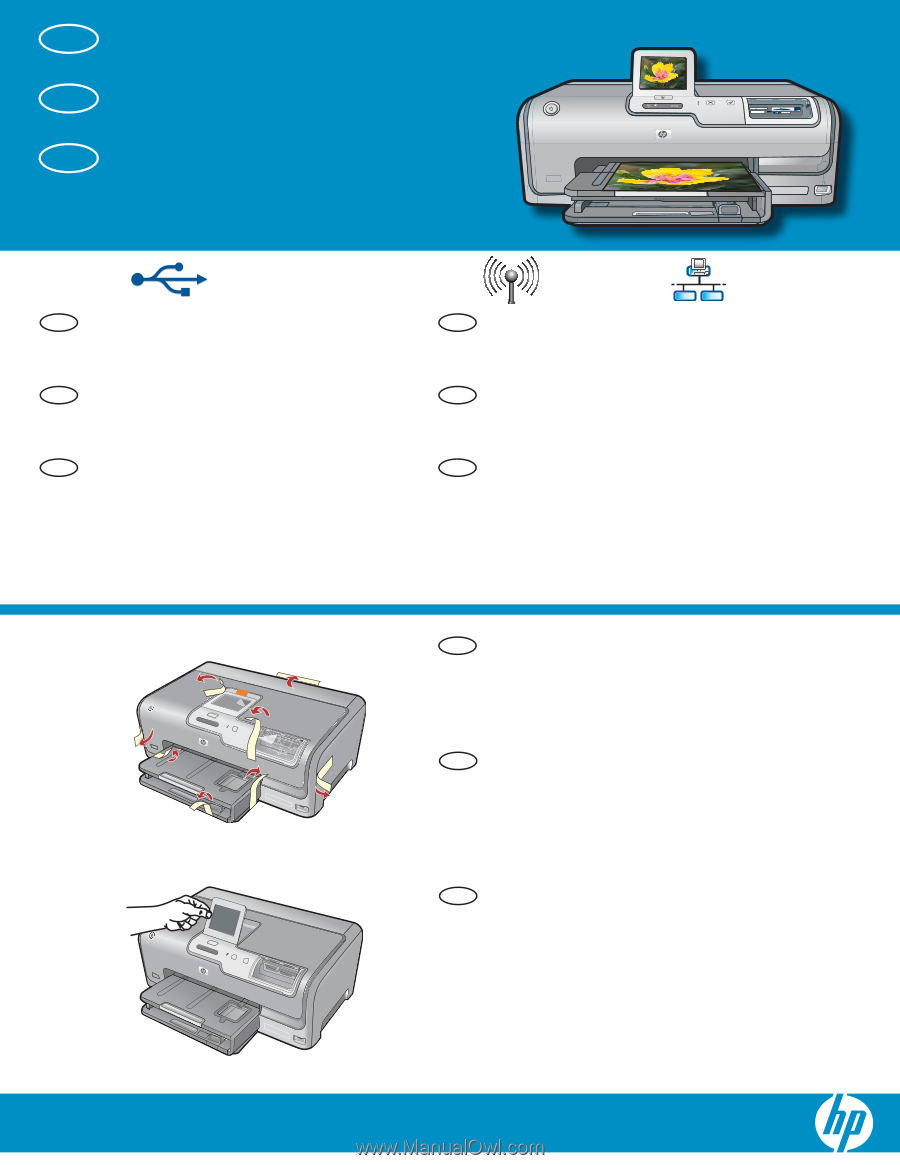
ble USB : ne connectez pas le câble USB avant la section A2. 802.11 Ethernet EN Wireless or wired network users: you must follow the instructions in this Setup Guide to be successful adding the HP Photosmart to your network. ES Usuarios de red cableada o inalámbrica: siga las instrucciones de la - HP Photosmart D7400 | Setup Guide - Page 2
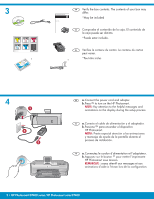
du carton peut varier. *Peut être inclus * 4 EN a. Connect the power cord and adapter. b. Press to turn on the HP Photosmart. NOTE: Pay attention to the helpful messages and animations on the display during the setup process. ES a. Conecte el cable de alimentación y el adaptador. b. Presione - HP Photosmart D7400 | Setup Guide - Page 3
appears asking to install ink • Si vous êtes invité à installer des cartouches cartridges, go to the next step in this d'encre, passez à l'étape suivante de ce guide. guide. ES Realice , puis les lever. b. Levez les six loquets. HP Photosmart série D7400/ HP Photosmart D7400 series • 3 - HP Photosmart D7400 | Setup Guide - Page 4
: Use only the ink cartridges that came with the printer. The ink in these cartridges is specially formulated to mix with the ink in the print head assembly at first-time setup. e. Close the access de l'imprimante. e. Fermez la porte d'accès. 4 • HP Photosmart D7400 series/HP Photosmart série D7400 - HP Photosmart D7400 | Setup Guide - Page 5
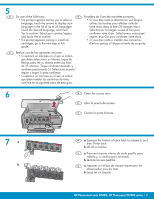
Soulevez le capot du bac photo. the photo tray. Slide the paper guides against b. Chargez le papier photo côté brillant vers le bas the photo paper. dans le bac photo. Placez les guides du papier c. Push the photo tray in, and lower the photo contre le papier photo. tray lid. c. Insérez le - HP Photosmart D7400 | Setup Guide - Page 6
- USB, B - Ethernet/Wired, or C - 802.11/ Wireless) ES Elija sólo UN tipo de conexión (A - USB, B - Ethernet/cableada o C - 802.11/ inalámbrica). FR Sélectionnez UN SEUL type de connexion (A - USB, B - Ethernet/Wired ou C - 802.11/ Wireless) 6 • HP Photosmart D7400 series/HP Photosmart série D7400 - HP Photosmart D7400 | Setup Guide - Page 7
votre réseau. Equipement requis : routeur et câble Ethernet. EN Use the instructions in Section C type if you want a wireless (802.11b or 802.11g) connection between the HP Photosmart and your network. Equipment needed: wireless router. ES Lea las instrucciones de la sección C, si desea establecer - HP Photosmart D7400 | Setup Guide - Page 8
-click My Computer, double-click the CD-ROM icon with the HP logo, and then double-click setup.exe. EN IMPORTANT: Purchase a USB cable separately if it is not included. a. Connect the USB cable to the port on the back of the HP Photosmart, and then to any USB port on the computer. ES - HP Photosmart D7400 | Setup Guide - Page 9
connect the USB cable to the port on the back of the HP Photosmart, and then to any USB port on the computer. b. Follow the onscreen instructions to complete the software installation. c. Go to page 22 to explore your HP Photosmart. ES IMPORTANTE: Compre un cable USB por separado si no está incluido - HP Photosmart D7400 | Setup Guide - Page 10
EN USB Troubleshooting FR Dépannage USB ES Solución de problemas de USB www.hp.com/support EN Problem: (Windows) The Microsoft Add Hardware screen appears. Action: Cancel all screens. Unplug the USB cable, and then insert the green HP Photosmart CD. Refer to Section A. EN Problem: (Windows only) - HP Photosmart D7400 | Setup Guide - Page 11
www.hp.com/support FR Problème : (Windows)-l'écran Microsoft Ajout de matériel s'affiche. Action : cliquez sur Annuler sur tous les écrans affichés. Débranchez le câble USB, puis introduisez le CD-ROM vert du logiciel HP Photosmart. Reportez-vous à la section A. FR Problème : (Windows uniquement)-l'é - HP Photosmart D7400 | Setup Guide - Page 12
the Internet port). e. Go to Section D of this Setup Guide to install your software. ES a. Localice el cable Ethernet. b. Extraiga el conector ). e. Allez à la section D Guide de configuration pour installer votre logiciel. Important: Your computer and the HP Photosmart must be on the same active, - HP Photosmart D7400 | Setup Guide - Page 13
systems. If the Wireless Network Assistant is unable to retrieve your network information, you must consult the documentation for your wireless router, the router manufacturer, or the person who originally setup your wireless network. b. Using the touch screen of your HP Photosmart, touch (Setup - HP Photosmart D7400 | Setup Guide - Page 14
guré votre routeur sans fil. b. A l'aide du clavier tactile de votre HP Photosmart, sélectionnez (Configuration) dans le coin supérieur droit. c. Dans guration réseau. h. Allez à la section D Guide de configuration pour installer votre logiciel. 14 • HP Photosmart D7400 series/HP Photosmart série D7400 - HP Photosmart D7400 | Setup Guide - Page 15
vous avez terminé : touchez Terminer HP Photosmart D7400 series Basics Guide EN If you have problems connecting to the network, see the Basics Guide for additional troubleshooting information. You can also refer to the Basics Guide for information on other wireless network connection methods. ES En - HP Photosmart D7400 | Setup Guide - Page 16
wait for the desktop to appear. b. Insert the green CD. c. Double-click the HP Photosmart CD icon on the desktop. d. Double-click the HP Photosmart Installer icon. Follow the onscreen instructions. e. Complete the Setup Assistant Screen. ES a. Encienda el equipo, inicie la sesión si es necesario - HP Photosmart D7400 | Setup Guide - Page 17
autres ordinateurs sont connectés au réseau, network, install the HP Photosmart software on installez le logiciel HP Photosmart sur chacun d'eux. each computer. Suivez les instructions affichées à l'écran. Veillez à Follow the onscreen instructions. Make sure that définir les types de connexion - HP Photosmart D7400 | Setup Guide - Page 18
de red www.hp.com/support EN Problem: After you run the Wireless Setup Wizard from the HP Photosmart control panel, the HP Photosmart cannot connect to the network. Action: • You can print a diagnostic report that may help identify the problem. Run the Wireless Network Test from the HP All-in One - HP Photosmart D7400 | Setup Guide - Page 19
www.hp.com/support FR Problème : si vous lancez l'assistant de configuration sans fil depuis le panneau de commande HP Photosmart, ce dernier microondes). Veillez à ne pas faire fonctionner ces appareils durant l'installation de HP Photosmart. • Vous devrez peut-être réinitialiser votre routeur sans - HP Photosmart D7400 | Setup Guide - Page 20
www.hp.com/support EN Problem: While you install the HP Photosmart software, you see the error message Printer Not Found. Action: • The HP Photosmart may not be connected to your network. For a wireless connection, make sure you have run the Wireless Setup Wizard from the control panel before - HP Photosmart D7400 | Setup Guide - Page 21
exactly. Make sure you have not accidently inserted blank spaces at the beginning or end. • If you are using the default network name (SSID) provided by your wireless router manufacturer, your HP Photosmart may be trying to connect to another wireless router in your neighborhood that uses the same - HP Photosmart D7400 | Setup Guide - Page 22
HP Photosmart installé sur votre ordinateur, vous pouvez tester une des fonctionnalités du périphérique HP Photosmart. ES Ahora que ha instalado el programa de software HP Photosmart en su equipo, puede probar algunas de las funciones del dispositivo HP Photosmart. EN Print a 4 x 6 inch photo - HP Photosmart D7400 | Setup Guide - Page 23
Express d. View Photos 1/999 e. View Photos 1/999 View Print Create Share Save f. Print Preview Print Preview Edit Photo Print All Preview Select All Done g. Print Preview Options Print 1/999 4 x 6 Borderless Add More Settings Print EN c. When the Photosmart Express menu appears - HP Photosmart D7400 | Setup Guide - Page 24
, reportez-vous au Guide d'utilisation du HP Photosmart série D7400 et à l'écran d'aide qui fournit des instructions détaillées sur l'utilisation de toutes les fonctionnalités du HP Photosmart. 2007 Hewlett-Packard Development Company, L.P. Printed in () Printed in () Printed in () *CC247-90960
-
 1
1 -
 2
2 -
 3
3 -
 4
4 -
 5
5 -
 6
6 -
 7
7 -
8
-
9
-
10
-
11
-
12
-
13
-
14
-
15
-
16
-
17
-
18
-
19
-
20
-
21
-
22
-
23
-
24
 |
 |
HP Photosmart D7400 series
2
1
USB
802.11
Ethernet
/HP Photosmart série D7400
Retirez le ruban adhésif, les languettes et le
fi
lm
protecteur du couvercle, ainsi que de l’avant et de
l’arrière du périphérique.
Soulevez l’écran tactile et retirez le
fi
lm protecteur.
Vous pouvez positionner l’écran pour améliorer
l’af
fi
chage.
a.
b.
A l’attention des utilisateurs de câble
USB
: ne connectez pas le câble USB
avant la
section A2
.
Commencez ici
A l’attention des utilisateurs de réseau câblé ou sans
fi
l
: suivez les instructions du guide de con
fi
guration
pour ajouter HP Photosmart sur votre réseau.
Usuarios de cable USB
: no conecte el
cable USB hasta la
sección A2
.
Retire las cintas, las lengüetas y la película
protectora de la tapa, así como de la parte
anterior y posterior del dispositivo.
Levante la pantalla táctil y retire la cinta protectora.
Regule el ángulo de inclinación de la pantalla
hasta obtener una visión óptima.
a.
b.
Comience aquí
Usuarios de red cableada o inalámbrica
: siga las
instrucciones de la Guía de instalación para cargar
correctamente el dispositivo HP Photosmart en la red.
USB cable users
: Do not connect the USB
cable until
Section A2
.
Start Here
Remove all tape, tabs, and protective
fi
lm from the
lid and from the front and back of the device.
Lift the touchscreen display and remove the
protective
fi
lm. You can adjust the angle of the
display to a position suitable for viewing.
a.
b.
Wireless or wired network users
: you must follow
the instructions in this Setup Guide to be successful
adding the HP Photosmart to your network.
a
b
EN
ES
FR
EN
ES
FR
ES
FR
EN
EN
ES
FR