HP Photosmart Premium Fax e-All-in-One Printer - C410 Reference Guide - Page 1
HP Photosmart Premium Fax e-All-in-One Printer - C410 Manual
 |
View all HP Photosmart Premium Fax e-All-in-One Printer - C410 manuals
Add to My Manuals
Save this manual to your list of manuals |
Page 1 highlights
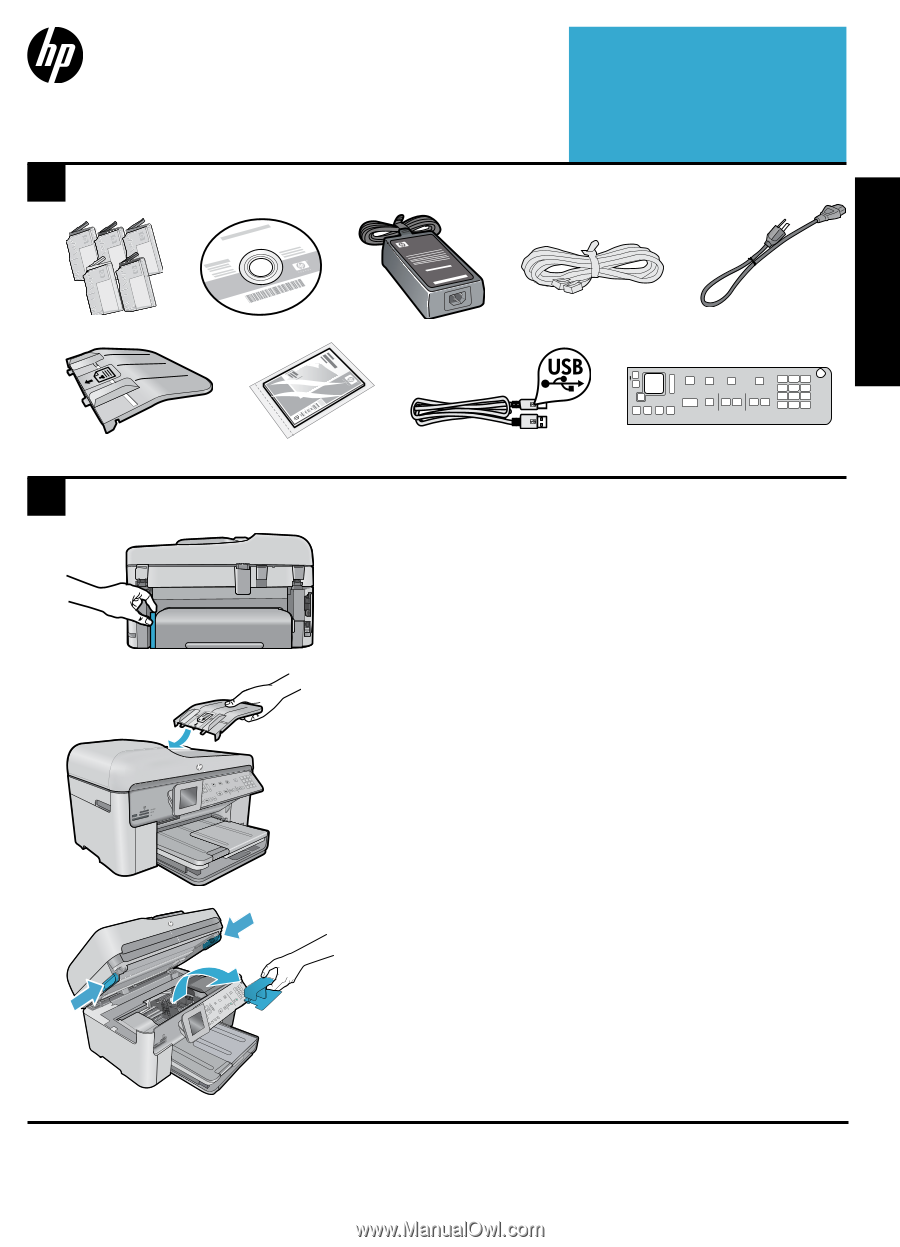
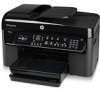
PHOTOSMART PREMIUM FAX e-ALL-IN-ONE C410 series Start setup here... 1 Verify box contents Inside... Setup troubleshooting 3 Get to know your HP Photosmart 4 Features and tips 6 Get more info 8 Specs 8 Networked printer setup and use 9 Fixing connectivity issues 10 English * * * * Not included with all models 2 Unpack printer. Remove all tape, protective film, and packing material. Remove the cardboard that secures the two-sided printing accessory (if present) Printed in [English] Printed in [French] © 2010 Hewlett-Packard Development Company, L.P. Install the document feeder tray 1. Remove the cardboard restraint from the top of the printer. 2. Install the document feeder tray, lining up the tabs on the edges with the slots in the printer. Insert the tabs into the slots until they snap into place. Remove the carriage restraint 1. Open the cartridge access door by pulling upward on the handles on the sides of the printer. • The cartridge access door cannot be opened if the scanner lid is open. 2. Remove the blue tape that holds the carriage restraint in place. 3. Slide the carriage to the left. 4. Remove the orange plastic restraint from the carriage. 5. Close the cartridge access door. *CQ521-90085* *CQ521-90085* CQ521-90085
-
 1
1 -
 2
2 -
 3
3 -
 4
4 -
 5
5 -
 6
6 -
 7
7 -
8
-
9
-
10
-
11
-
12
-
13
-
14
-
15
-
16
-
17
-
18
-
19
-
20
-
21
-
22
-
23
-
24
 |
 |