HP Photosmart R840 User Guide - Page 6
Getting started, Camera top, side, and back, Shooting Mode, Picture Capture, Flash, Video Record
 |
View all HP Photosmart R840 manuals
Add to My Manuals
Save this manual to your list of manuals |
Page 6 highlights
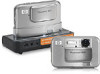
1 Getting started Use this section to get familiar with the camera controls, set up your digital camera for use, and begin taking pictures. Camera top, side, and back 4 56 7 8 9 12 3 14 13 12 11 10 1 Mode button-Accesses the Shooting Mode menu while in Picture Capture (see "Using the shooting modes" on page 15). 2 Flash button-Accesses the flash settings while in Picture Capture (see "Setting the flash" on page 15). 3 selector-Switches between Picture Capture, Video Record, and Playback (see "Taking pictures" on page 10, "Recording video clips" on page 11, and "Reviewing images and video clips" on page 22). 4 Speaker. 5 Shutter button. 6 Power light. 7 Zoom lever-Accesses / Zoom (see "Using zoom" on page 13), Thumbnails (see "Viewing thumbnails" on page 23), and Magnify (see "Magnifying images" on page 23) functions. 8 and buttons-Scroll through menus and images. 9 button-Displays camera menus, selects options, and confirms actions. 10 USB connector. 11 Battery Charging light. 12 Delete button- Accesses the Delete function while in Playback (see "Deleting images" on page 23) or Instant Review (see "Instant Review" on page 11). 13 Back button-Returns you to the previous menu or view. 14 Image Display. 4 Getting started
-
 1
1 -
 2
2 -
 3
3 -
 4
4 -
 5
5 -
 6
6 -
 7
7 -
 8
8 -
 9
9 -
 10
10 -
 11
11 -
 12
12 -
13
-
14
-
15
-
16
-
17
-
18
-
19
-
20
-
21
-
22
-
23
-
24
-
25
-
26
-
27
-
28
-
29
-
30
-
31
-
32
-
33
-
34
-
35
-
36
-
37
-
38
-
39
-
40
-
41
-
42
-
43
-
44
-
45
-
46
-
47
-
48
-
49
-
50
-
51
-
52
-
53
-
54
-
55
-
56
-
57
-
58
-
59
 |
 |
