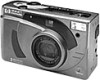
HP Photosmart c500 HP PhotoSmart C500 Digital Camera User’s Guide - C - Page 8
Files, Acquire, Images, Print, Album - user manual
 |
View all HP Photosmart c500 manuals
Add to My Manuals
Save this manual to your list of manuals |
Page 8 highlights
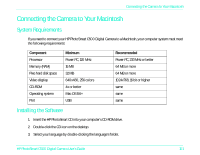
Connecting the Camera to Your PC 3. Open the photos you want to print: • If you have already downloaded photos from the camera, open the folder where the photos are stored. Click Open Files, navigate to the appropriate folder, select the photo files you want to print, and then click OK. • If you have not downloaded the photos from the camera yet, connect the camera to your PC and click Acquire Images. See the software's Help for details. Note: Acquire Images does not save the photos to your computer's hard drive; it displays a copy for you to view and manipulate. You need to manually save each image from the software. 4. Choose how to use your photos: • Click the Album button to create album pages. • Select the layout, page size and page orientation, then click OK. • Click the Prints button to create standard sized reprints of your photos. • Select the layout and page size, then click OK. 5. Place your photos onto the album or reprints page by dragging them from the gallery. Note: You can adjust the Exposure, Color, Rotation, Scaling and Sharpness by double-clicking on a photo and opening the Image Adjustments window. See the software's Help for details. 6. Click the Print button to print your photos. Note: For complete information on the HP Photo Printing software features, click Help. HP PhotoSmart C500 Digital Camera User's Guide 100
-
 1
1 -
2
-
 3
3 -
 4
4 -
 5
5 -
 6
6 -
 7
7 -
 8
8 -
 9
9 -
 10
10 -
 11
11 -
 12
12 -
 13
13 -
14
-
15
-
16
-
17
-
18
-
19
-
20
-
21
-
22
 |
 |
