HP Presario 1900 Model XL1-XL165-Maintenance & Service Guide Presario 1900 - Page 2
Before You Begin - series
 |
View all HP Presario 1900 manuals
Add to My Manuals
Save this manual to your list of manuals |
Page 2 highlights
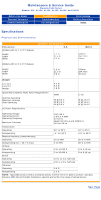
Maintenance & Service Guide Presario 1900 Series Models: XL1, XL160, XL161, XL162, XL163, and XL165 Before You Begin Removal Sequence Product Description Specifications Troubleshooting Pin Assignments Parts Catalog Battery Operations Index Before You Begin Table Of Contents Notice Preface Product Description Bottom of Unit Controls and Lights Left Side and Top Wedge Components Leftside Components Models and Features Power Management for Windows 98 Rear Connectors Rightside Components Right Side Wedge Components Status Panel Parts Catalog Boards Configure to Order Display Assembly Documentation and Software Mass Storage Devices Miscellaneous Hardware and Plastics Kit Miscellaneous Parts Kit System Unit Specifications Display Memory Expansion Physical and Environmental System DMA System Interrupts System I/O Addresses System Memory Catalog Top of Page Battery Operations Conditioning A Battery Pack Disposing Of Used Battery Pack Increasing Battery Pack Operating Time Pin Assignments Keyboard and Mouse Modem Connector Parallel Connector S-Video and Universal Serial Bus Removal Sequence Battery Pack Cables and Connectors Converter Board Display Panel Assembly Electrostatic Discharge Fan Assembly Hard Drive Hard Drive/Battery Charger Board Heatspreader Hinge Keyboard Low Voltage Differential Signal Interface Board (LVDS) Memory Module Modem PC Card Slot Preparing the Computer for Disassembly Processor RJ-11 Cable Serial Number Service Considerations Speaker Assembly System Board Upper CPU Cover Zif Connector Troubleshooting Clearing the Power-On Password Compaq Diagnostics Contacting Compaq Support Diagnostic Error Codes Power-On Self Test (POST) Preliminary Steps Solving Minor Problems Troubleshooting Without Diagnostics Top of Page
-
 1
1 -
 2
2 -
 3
3 -
 4
4 -
 5
5 -
 6
6 -
 7
7 -
 8
8 -
9
-
10
-
11
-
12
-
13
-
14
-
15
-
16
-
17
-
18
-
19
-
20
-
21
-
22
-
23
-
24
-
25
-
26
-
27
-
28
-
29
-
30
-
31
-
32
-
33
-
34
-
35
-
36
-
37
-
38
-
39
-
40
-
41
-
42
-
43
-
44
-
45
-
46
-
47
-
48
-
49
-
50
-
51
-
52
-
53
-
54
-
55
-
56
-
57
-
58
-
59
-
60
-
61
-
62
-
63
-
64
-
65
-
66
-
67
-
68
-
69
-
70
-
71
-
72
-
73
-
74
-
75
-
76
-
77
-
78
-
79
-
80
-
81
-
82
 |
 |
