HP Presario SR5600 Upgrading and Servicing Guide - Page 14
Cable Select jumper, drives in their respective positions in the chassis.
 |
View all HP Presario SR5600 manuals
Add to My Manuals
Save this manual to your list of manuals |
Page 14 highlights
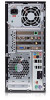
4 Make sure the jumper on the new optical drive or new Parallel ATA hard disk drive is in the CS (Cable Select) position. Your drive may vary from the illustration. The Serial ATA hard disk drive does not use Cable Select. CS SL MA Cable Select jumper 5 Release the drive bay by pulling the latch out away from the chassis and then sliding the drive part way into the front of the chassis. (The latch drive brackets secure the drives in their respective positions in the chassis.) 6 Connect the power and data cables from the back of the optical drive you want to add. Reconnect the sound cable, if present. WARNING: For a second Parallel ATA drive, make sure to connect the data cable labeled Master to the primary hard disk drive, and the data cable labeled Slave to the secondary hard disk drive. If the data cable is not connected correctly, the PC is unable to locate the hard disk drive and data may be lost. 10 Upgrading and Servicing Guide
-
 1
1 -
2
-
3
-
4
-
5
-
6
-
7
-
8
-
 9
9 -
 10
10 -
 11
11 -
 12
12 -
 13
13 -
 14
14 -
 15
15 -
 16
16 -
 17
17 -
 18
18 -
 19
19 -
20
-
21
-
22
-
23
-
24
-
25
-
26
-
27
-
28
-
29
-
30
-
31
-
32
 |
 |
