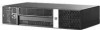
HP Rp3000 Quick Setup and Getting Started Guide - Page 13
Downloading the Latest Version of HP Insight Diagnostics, Software & Driver Downloads
 |
UPC - 884420494096
View all HP Rp3000 manuals
Add to My Manuals
Save this manual to your list of manuals |
Page 13 highlights
NOTE: HP Insight Diagnostics is included as part of the Recovery Disk Set with some computer models only. If you have already created a Recovery Disc Set, begin the following procedure at step 4. 1. Click Start > HP Backup and Recovery > HP Backup and Recovery Manager to open the Backup and Recovery Wizard, then click Next. 2. Select Create a set of recovery discs (Recommended) and click Next. 3. Follow the instructions in the wizard to create a Recovery Disc Set. 4. Use Windows Explorer to search the Recovery Disc Set for the CD with the compaq\hpdiags directory. 5. While the computer is on, insert the CD into an optical drive on the computer. 6. Shut down the operating system and turn off the computer. 7. Turn on the computer. The system will boot to the CD. NOTE: If the system does not boot to the CD in the optical drive, you may need to change the boot order in the Computer Setup (F10) utility so that the system attempts to boot to the optical drive before booting to the hard drive. Refer to the Computer Setup (F10) Utility Guide for more information. 8. Select the appropriate language and click Continue. NOTE: It is recommended that you accept the assigned default keyboard for your language unless you want to test your specific keyboard. 9. In the End User License Agreement page, click Agree if you agree with the terms. The HP Insight Diagnostics utility launches with the Survey tab displayed. Downloading the Latest Version of HP Insight Diagnostics 1. Go to http://www.hp.com. 2. Click the Software & Driver Downloads link. 3. Select Download drivers and software (and firmware). ENWW HP Insight Diagnostics 5
-
 1
1 -
2
-
3
-
4
-
5
-
6
-
7
-
 8
8 -
 9
9 -
 10
10 -
 11
11 -
 12
12 -
 13
13 -
 14
14 -
 15
15 -
 16
16 -
 17
17 -
 18
18 -
19
 |
 |
