HP SW TL881 DLT Mini-Lib/1 Compaq TL881 MiniLibrary Drive Upgrade Procedure (M
HP SW TL881 DLT Mini-Lib/1 Manual
 |
View all HP SW TL881 DLT Mini-Lib/1 manuals
Add to My Manuals
Save this manual to your list of manuals |
HP SW TL881 DLT Mini-Lib/1 manual content summary:
- HP SW TL881 DLT Mini-Lib/1 | Compaq TL881 MiniLibrary Drive Upgrade Procedure (M - Page 1
TL881 MiniLibrary Drive Upgrade Procedure First Edition (May 1999) Part Number ER-TL881-DA. A01/138248-001 Compaq Computer Corporation - HP SW TL881 DLT Mini-Lib/1 | Compaq TL881 MiniLibrary Drive Upgrade Procedure (M - Page 2
All rights reserved. Printed in the U.S.A. The software described in this guide is furnished under a license agreement or nondisclosure agreement. The software may Systempro/XL, SoftPaq, QuickBlank, QuickLock are trademarks and/or service marks of Compaq Computer Corporation. Microsoft, MS-DOS, - HP SW TL881 DLT Mini-Lib/1 | Compaq TL881 MiniLibrary Drive Upgrade Procedure (M - Page 3
Contents About This Guide Text Conventions...v Symbols in Text...vi Symbols on Equipment vi Rack Stability ...vii Getting Help ...vii Compaq Technical Support vii Compaq Website viii Compaq Authorized Reseller ix Adding a Second Tape Drive Parts Location...1 Overall Procedure 2 Removing and - HP SW TL881 DLT Mini-Lib/1 | Compaq TL881 MiniLibrary Drive Upgrade Procedure (M - Page 4
iv TL881 MiniLibrary Drive Upgrade Procedure List of Figures Figure 1. Parts Location 1 Figure 2. Removing the Skin Cover 3 Figure 3. Removing the Cover Plate 5 Figure 4. Drive Caddy Assembly Parts 6 List of Tables Table 1 Parts Location 2 - HP SW TL881 DLT Mini-Lib/1 | Compaq TL881 MiniLibrary Drive Upgrade Procedure (M - Page 5
About This Guide This guide is designed to be used as step-by-step instructions for installation and as a reference for operation, troubleshooting, and future upgrades. Text Conventions This document uses the following conventions to distinguish elements of text: Keys Keys appear in boldface. A - HP SW TL881 DLT Mini-Lib/1 | Compaq TL881 MiniLibrary Drive Upgrade Procedure (M - Page 6
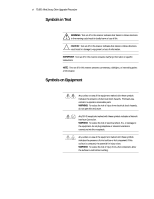
be found in the text of this guide. They have the following meanings. WARNING: this manner presents clarifying information or specific instructions. NOTE: Text set off in this manner electrical shock hazards. Enclosed area contains no operator serviceable parts. WARNING: To reduce the risk of injury - HP SW TL881 DLT Mini-Lib/1 | Compaq TL881 MiniLibrary Drive Upgrade Procedure (M - Page 7
for as long you own the product. A technical support specialist will help you diagnose the problem or guide you to the next step in the warranty process. In North America, call the Compaq Technical Phone Support Center at 1-800-OK-COMPAQ1. This service is available 24 hours a day, 7 days a week - HP SW TL881 DLT Mini-Lib/1 | Compaq TL881 MiniLibrary Drive Upgrade Procedure (M - Page 8
on to the Internet at http://www.compaq.com. Be sure to have the following information available before you call Compaq: s Technical support registration number (if applicable) s Product serial number (s) s Product model name(s) and numbers(s) s Applicable error messages s Add-on boards or hardware - HP SW TL881 DLT Mini-Lib/1 | Compaq TL881 MiniLibrary Drive Upgrade Procedure (M - Page 9
About This Guide ix Compaq Authorized Reseller For the name of your nearest Compaq Authorized Reseller: s In the United States, call 1-800-345-1518. s In Canada, call 1-800-263-5868. s Elsewhere, see the Compaq website for locations and telephone numbers. - HP SW TL881 DLT Mini-Lib/1 | Compaq TL881 MiniLibrary Drive Upgrade Procedure (M - Page 10
Adding a Second Tape Drive IMPORTANT: All screws that do not use lock washers, captive washers or lock nuts must have Loctite 222 applied when parts are reassembled in the field. If you ignore this step, you might cause premature failure of the mechanism. Parts Location Figure 1 shows the - HP SW TL881 DLT Mini-Lib/1 | Compaq TL881 MiniLibrary Drive Upgrade Procedure (M - Page 11
security lock Leadscrew Overall Procedure NOTE: If the base module is part of an expanded TL881 MiniLibrary subsystem, refer to the TL881 Mini Library Service Manual for information on removing the base module from the subsystem. To add a second drive to the base module you must do the following - HP SW TL881 DLT Mini-Lib/1 | Compaq TL881 MiniLibrary Drive Upgrade Procedure (M - Page 12
Adding a Second Tape Drive 3 4. Install the new drive using the procedure described in this document. 5. Replace the drive caddy assembly. 6. Replace the cover plate. 7. Replace the skin cover. Removing and Replacing the Skin Cover (Desktop Models Only) The skin cover is held in place by two screws - HP SW TL881 DLT Mini-Lib/1 | Compaq TL881 MiniLibrary Drive Upgrade Procedure (M - Page 13
4 TL881 MiniLibrary Drive Upgrade Procedure 1. Position the skin cover over the base module with the two angled surfaces facing toward the front. 2. Slide the skin cover over the module until it touches the front panel. 3. Insert the two screws on each side through the skin cover into the base - HP SW TL881 DLT Mini-Lib/1 | Compaq TL881 MiniLibrary Drive Upgrade Procedure (M - Page 14
Adding a Second Tape Drive 5 Figure 3. Removing the Cover Plate SHR-120366 Removing and Replacing the Drive Caddy Assembly The drive caddy assembly is an enclosure that holds one or two DLT drives and the interconnecting cables. The assembly includes the SCSI interface connectors and cables for - HP SW TL881 DLT Mini-Lib/1 | Compaq TL881 MiniLibrary Drive Upgrade Procedure (M - Page 15
6 TL881 MiniLibrary Drive Upgrade Procedure 5 27 1 7 5 3 6 4 4 SHR-1204 Figure 4. Drive Caddy Assembly Parts 3. Disconnect the drive power "Y" cable (2) from the power supply connector. 4. Disconnect the drive 1 RS-422 cable (3) at the controller PWB end. 5. Remove two M4 x 8mm flat-head - HP SW TL881 DLT Mini-Lib/1 | Compaq TL881 MiniLibrary Drive Upgrade Procedure (M - Page 16
Adding a Second Tape Drive 7 7. Grasp the handle on top and lift the drive caddy assembly out of the base module carefully; be careful the door levers don't bump against the chassis crossbrace. 8. Set the drive caddy assembly on the work surface and install the second tape drive as described in - HP SW TL881 DLT Mini-Lib/1 | Compaq TL881 MiniLibrary Drive Upgrade Procedure (M - Page 17
8 TL881 MiniLibrary Drive Upgrade Procedure Installing the Second Tape Drive Do the following steps to install the second tape drive. 1. Remove the four 6-32 sems pan-head Phillips screws (7) that hold the blank panel in place in the drive caddy assembly; there are two on the top of the assembly ( - HP SW TL881 DLT Mini-Lib/1 | Compaq TL881 MiniLibrary Drive Upgrade Procedure (M - Page 18
6 F Field replaceable parts 1 G getting help vii H help additional sources vii Compaq website viii Compq authorized resellers, telephone numbers viii technical support telephone numbers vii http://www.compaq.com viii I icons symbols on equipment vi L Loctite 222 1 O Overall Procedure 2 P power and - HP SW TL881 DLT Mini-Lib/1 | Compaq TL881 MiniLibrary Drive Upgrade Procedure (M - Page 19
Drive Upgrade Procedure S SCSI cable connectors 5 second tape drive 7 skin cover 2 symbols in text vi symbols on equipment vi T Table 1 Parts Location 2 technical support viii telephone numbers viii text conventions v W warnings electrical shock vii rack stability vii www.compaq.com. viii
-
 1
1 -
 2
2 -
 3
3 -
 4
4 -
 5
5 -
 6
6 -
 7
7 -
8
-
9
-
10
-
11
-
12
-
13
-
14
-
15
-
16
-
17
-
18
-
19
 |
 |

TL881 MiniLibrary Drive Upgrade
Procedure
First Edition (May 1999)
Part Number ER-TL881-DA. A01/138248-001
Compaq Computer Corporation