HP Scanjet Enterprise 7000n HP Scanjet Enterprise 7000n - (multiple language) - Page 12
Use the Embedded Web Server EWS
 |
View all HP Scanjet Enterprise 7000n manuals
Add to My Manuals
Save this manual to your list of manuals |
Page 12 highlights
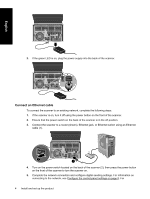
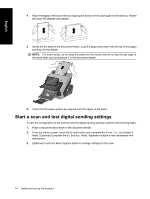
English If the Device Information button does not appear, find the IP address: ● Touch the Administration button, and then touch the Information button. ● Touch the Configuration/Status Pages button, and then touch the button related to device configuration pages. ● Touch the View button. The product configuration information appears. ● Scroll through the information to find the IP address. Manually assign an IP address 1. Touch the Administration button, and then touch the Initial Setup button. 2. Touch the Networking and I/O button, and then touch the Embedded Jetdirect button. 3. Touch the TCP/IP button, and then touch either the IPV4 Settings button (such as http:// 192.168.1.1) or the IPV6 button (such as http://[2001:0ba0:0000.0000.0000.0000.0000:1234]). 4. Touch the Config Method button. 5. Touch the Manual button, and then touch the Save button. 6. Touch the Manual settings button. 7. Touch the IP address button. Touch the IP address field, and then type the IP address. 8. Touch the OK button. Use the E-mail Setup Wizard Use the E-Mail Setup Wizard to set up options for sending scanned images as e-mail attachments. NOTE: To send e-mail, the scanner must be connected to a network server that has a valid SMTP address. If no SMTP server is available, you cannot send e-mail from the network scanner. 1. From the Home screen, touch the Administration button. 2. Touch the Initial Setup selection. 3. Touch the E-Mail Setup selection. 4. Touch the E-Mail Setup Wizard selection, and then follow the onscreen instructions. Use the Embedded Web Server (EWS) Use the EWS to configure advanced e-mail settings and additional features such as: ● E-mail ● Save to Network Folder ● Address Book ● Digital fax ● Save to USB ● Quick Sets ● Windows authentication ● LDAP authentication ● Novell authentication ● Local Access Code authentication 6 Install and set up the product
-
 1
1 -
2
-
3
-
4
-
5
-
6
-
 7
7 -
 8
8 -
 9
9 -
 10
10 -
 11
11 -
 12
12 -
 13
13 -
 14
14 -
 15
15 -
 16
16 -
 17
17 -
18
-
19
-
20
-
21
-
22
-
23
-
24
-
25
-
26
-
27
-
28
-
29
-
30
-
31
-
32
-
33
-
34
-
35
-
36
-
37
-
38
-
39
-
40
-
41
-
42
-
43
-
44
-
45
-
46
-
47
-
48
-
49
-
50
-
51
-
52
-
53
-
54
-
55
-
56
-
57
-
58
-
59
-
60
-
61
-
62
-
63
-
64
-
65
-
66
-
67
-
68
 |
 |
