HP Scitex FB10000 Geffen TS Error 67014 - Page 6
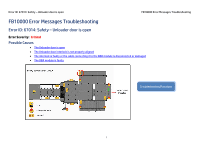
Error ID: 67014: Safety - Unloader door is open, completion
 |
View all HP Scitex FB10000 manuals
Add to My Manuals
Save this manual to your list of manuals |
Page 6 highlights
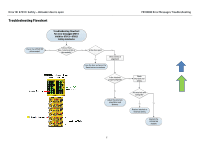
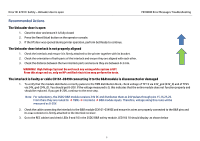
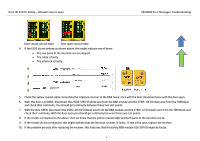
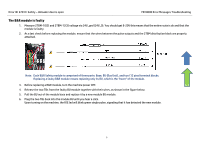
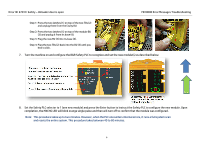
Error ID: 67014: Safety - Unloader door is open FB10000 Error Messages Troubleshooting Step 1: Press the two latches (1) on top of the two TBs (2) and unplug them from the faulty BU. Step 2: Press the two latches (5) on top of the module BU (3) and unplug it from its base (4). Step 3: Plug the new BU (3) into its base (4). Step 4: Plug the two TBs (2) back into the BU (3) until you hear a click. 7. Turn the machine on and configure the B&R Safety PLC to recognize and set the new module(s) as described below. w ch 8. Set the Safety PLC selector to 1 (one new module) and press the Enter button to instruct the Safety PLC to configure the new module. Upon completion, the MXCHG LED will blink orange single pulse and then will turn off to confirm that the module was configured. Note: This procedure takes up to two minutes. However, when the PLC encounters internal errors, it runs a full system scan and resets the entire system. This procedure takes between 40 to 60 minutes. 6
-
 1
1 -
 2
2 -
 3
3 -
 4
4 -
 5
5 -
 6
6 -
 7
7 -
 8
8
 |
 |
