HP Scitex FB500 HP Scitex FB500 and FB700 Printer Series - Release Notes - Page 10
Reducing “swath edge” banding on synthetic media - inks
 |
View all HP Scitex FB500 manuals
Add to My Manuals
Save this manual to your list of manuals |
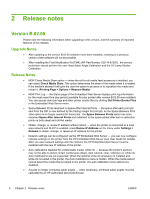
Page 10 highlights
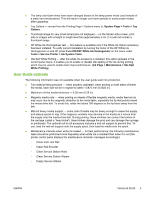
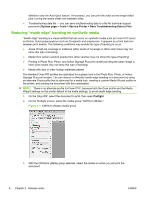
definition uses the Auto Eject feature. If necessary, you can print the sides as two single-sided jobs, turning the media sheet over between sides. ● Troubleshooting data file - you can save troubleshooting data to a file for technical support personnel (System page > Tools > Service Printer > Save Troubleshooting Data to File) Reducing "swath edge" banding on synthetic media "Swath edge" banding is a visual artifact that can occur on synthetic media such as Foam PVC (such as Sintra), fluted polypropylene (such as Coroplast), and polystyrene. It appears as a faint dark line between print swaths. The following conditions may enable this type of banding to occur: ● Areas of high ink coverage in midtones (other levels of coverage or other color tones may not show this type of banding) ● Media from certain vendors (media from other vendors may not show this type of banding) ● Printing in Photo Plus, Photo, and Indoor Signage Plus print modes (printing the same image in other print modes may not show this type of banding) ● Media with dust or other foreign materials present The standard Onyx RIP profiles are optimized for a glossy look in the Photo Plus, Photo, or Indoor Signage Plus print modes. You can reduce or eliminate swath-edge banding in a document by using an alternate Onyx profile that is optimized for a matte look, creating a custom Media Wizard profile on the printer, and printing the document with this combination. NOTE: There is no alternate profile for Foam PVC, because both the Onyx profile and the Media Wizard settings on the printer default to the matte settings, to avoid swath edge banding. 1. On the Onyx RIP, select the document to print, then open Preflight. 2. On the Preflight screen, select the media group "CMYKcm (Matte)." Figure 2-1 CMYKcm (Matte) media group 3. With the CMYKcm (Matte) group selected, select the media on which you will print the document. 6 Chapter 2 Release notes ENWW
-
 1
1 -
2
-
3
-
4
-
 5
5 -
 6
6 -
 7
7 -
 8
8 -
 9
9 -
 10
10 -
 11
11 -
 12
12 -
 13
13 -
 14
14 -
 15
15 -
16
 |
 |
