HP Surestore 15 Slot with DLT7000 HP SureStore DLT Tape Library Models 4115w/4 - Page 26
Attach the Rack Slides to the Rack
 |
View all HP Surestore 15 Slot with DLT7000 manuals
Add to My Manuals
Save this manual to your list of manuals |
Page 26 highlights
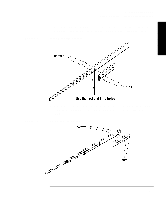
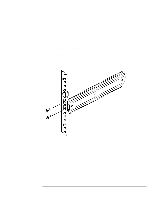
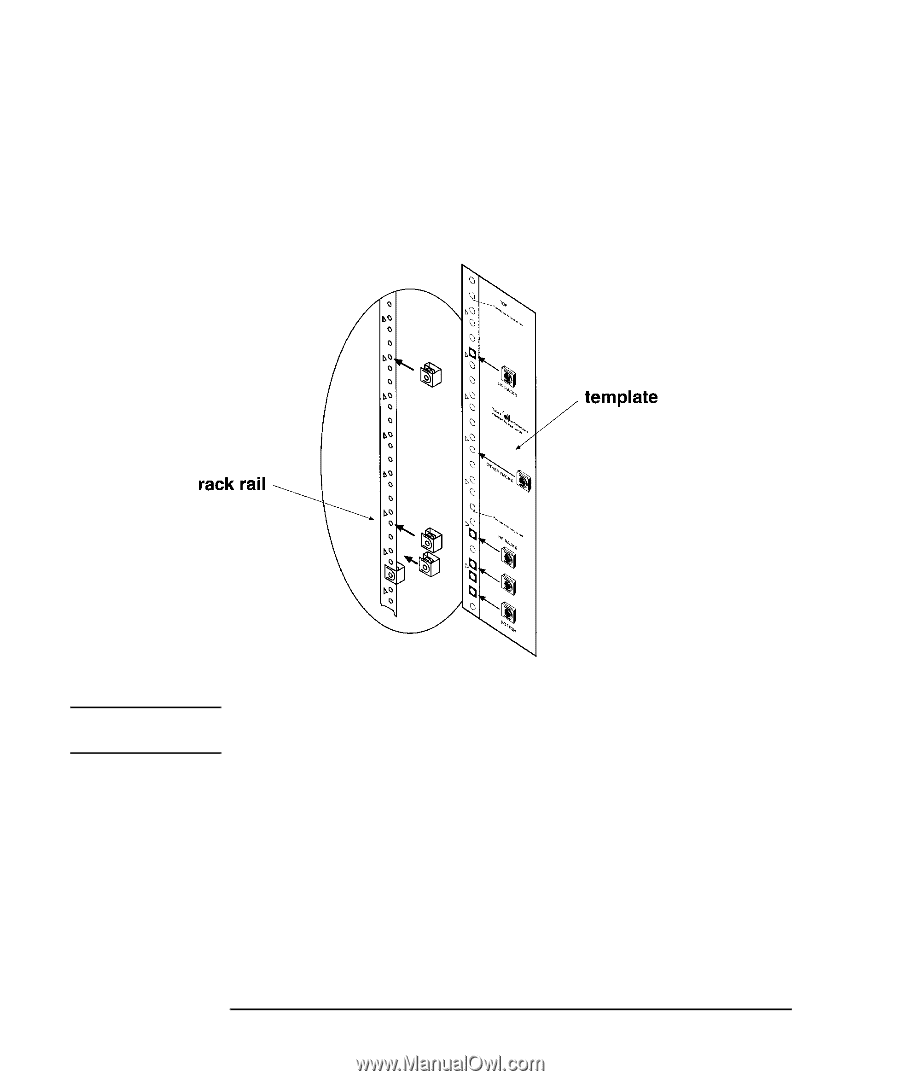
Figure 1-6 Installing the Tape Library Step 4: Mount the Library in a Rack (optional) Attach the Rack Slides to the Rack 1. Line up the template with an existing product in the rack. Attach clip nuts to each front rail in the locations indicated on the template. Clip Nuts (Front Rails) NOTE Do not install the library in the bottom of the rack. Make sure the bottom of the library is no higher than 4 feet off the floor. 1-12
-
 1
1 -
2
-
3
-
4
-
5
-
6
-
7
-
8
-
9
-
10
-
11
-
12
-
13
-
14
-
15
-
16
-
17
-
18
-
19
-
20
-
 21
21 -
 22
22 -
 23
23 -
 24
24 -
 25
25 -
 26
26 -
 27
27 -
 28
28 -
 29
29 -
 30
30 -
 31
31 -
32
-
33
-
34
-
35
-
36
-
37
-
38
-
39
-
40
-
41
-
42
-
43
-
44
-
45
-
46
-
47
-
48
-
49
-
50
-
51
-
52
-
53
-
54
-
55
-
56
-
57
-
58
-
59
-
60
-
61
-
62
-
63
-
64
-
65
-
66
-
67
-
68
-
69
-
70
-
71
-
72
-
73
-
74
-
75
-
76
-
77
-
78
-
79
-
80
-
81
-
82
-
83
-
84
-
85
-
86
-
87
-
88
-
89
-
90
-
91
-
92
-
93
-
94
-
95
-
96
-
97
-
98
-
99
-
100
-
101
-
102
-
103
-
104
-
105
-
106
-
107
-
108
-
109
-
110
-
111
-
112
-
113
-
114
-
115
-
116
-
117
-
118
-
119
-
120
-
121
-
122
-
123
-
124
-
125
-
126
-
127
-
128
-
129
-
130
-
131
-
132
-
133
-
134
-
135
-
136
 |
 |
1-12
Installing the Tape Library
Step 4: Mount the Library in a Rack (optional)
Attach the Rack Slides to the Rack
1.
Line up the template with an existing product in the rack. Attach clip nuts to
each front rail in the locations indicated on the template.
Figure 1-6
Clip Nuts (Front Rails)
NOTE
Do not install the library in the bottom of the rack. Make sure the bottom of the
library is no higher than 4 feet off the floor.