HP Surestore 80ex Adding 1 Drive to the C1100 Series Jukebox - C1156-90000 - Page 10
to the front panel PCA
 |
View all HP Surestore 80ex manuals
Add to My Manuals
Save this manual to your list of manuals |
Page 10 highlights
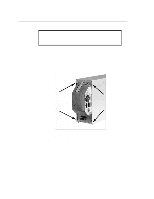
12. Connect the drive power, SCSI, and drive interface cables to the new drive. Connect the cables to the bottom drive first, then the top drive. Use the end connector on the SCSI cable to go to the top drive. Use either power connector on the drives. Use the longer drive interface cable to reach the top drive. 13. Mount the front RFI shield. 14. Thread the front panel cable up the front of the RFI shield and through the clip on the top of the shield. Figure 9: Front panel clip on RFI shield 15. Re-mount the front bezel. Before placing the front bezel against the chassis, connect the front panel cable and the mailslot sensor cable connectors to the front panel PCA, 16. Release the T-25 screw holding the picker in its stowed position at the top of the chassis. 17. Connect the power cable. Turn the jukebox on. 18. Run Test 2, the Wellness Test, to verify that the upgrade has been successful. 19. Re-mount the access panel and outside cover. 10
-
 1
1 -
2
-
3
-
4
-
 5
5 -
 6
6 -
 7
7 -
 8
8 -
 9
9 -
 10
10 -
 11
11 -
 12
12
 |
 |
