HP T5530 Connection Broker Client Configuration Document for HP Compaq t5135, - Page 12
Add Connection, General, Application, Connectivity, TCP Port, Credentials, Advanced, MyConnection, - issues
 |
UPC - 882780773684
View all HP T5530 manuals
Add to My Manuals
Save this manual to your list of manuals |
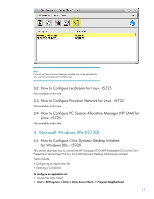
Page 12 highlights
[HKEY_LOCAL_MACHINE\software\microsoft\wbt\clients\registration\pntsc] "Description"="Provision Networks" "NewCmdLineArgs"="" "NewExe"="\\Hard Disk\\Program Files\\pntsc.exe" "Type"="PNTSC" Add Connection In order to make use of the Provision client one first adds a connection to HP ThinConnect. However, clicking the Add button from ThinConnect does not work with the Provision client. Instead, follow these steps: 1. Run PNTSC.EXE (See Figure 1: PNTSC Window). 2. From the General tab, select Application. 3. Click Connectivity. 4. Enter TCP Port 80 (See Figure 2: Connectivity Screen) 5. Click Add to enter Server Address 6. Click OK. 7. Click OK. 8. From Credentials tab, enter user credentials (See Figure 3: Credentials Screen). 9. From the General tab, select from the drop down box (See Figure 4: Published Apps List). 10. Click button Save As... 11. Type MyConnection 12. Click OK. 13. Close PNTSC Window. 14. Run HP ThinConnect. 15. Click Advanced. 16. Verify that MyConnection appears under Available Connections. 17. Assign MyConnection to Administrator by clicking on the right arrow button. 18. Click OK. Connect 1. Run HP ThinConnect. 2. Highlight "MyConnection" added from steps above. 3. Click Connect. Issues Although the Provision Network client requires the HP ThinConnect to work, the following ThinConnect buttons fail with Provision Network: Add Edit - bring up the PNTSC Window that has no idea which connection you clicked Edit on. You must click Save As and select the proper connection name. 12
-
 1
1 -
2
-
3
-
4
-
5
-
6
-
 7
7 -
 8
8 -
 9
9 -
 10
10 -
 11
11 -
 12
12 -
 13
13 -
 14
14 -
 15
15 -
 16
16 -
 17
17 -
18
-
19
-
20
-
21
 |
 |
