HP TC1000 Compaq Tablet PC TC1100 Series Hardware Guide - Page 145
Reinsert the 2 retaining screws that secure the cover to the, then press downward on
 |
UPC - 613326724071
View all HP TC1000 manuals
Add to My Manuals
Save this manual to your list of manuals |
Page 145 highlights
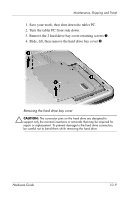
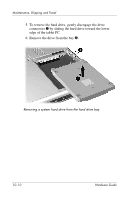
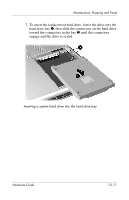
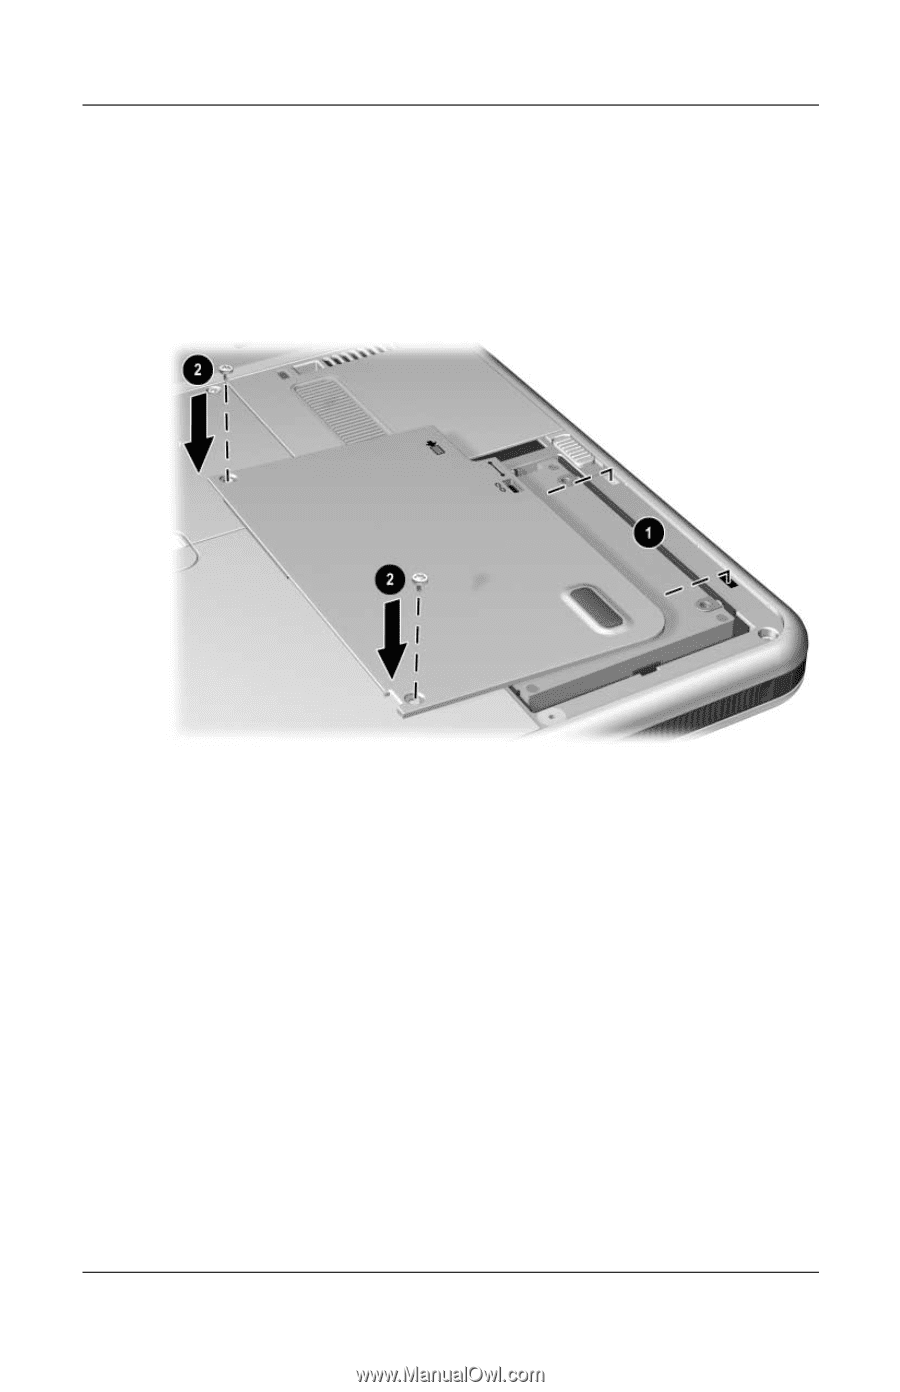
Maintenance, Shipping and Travel 8. Align the tabs on the hard drive bay cover with the cover slots on the tablet PC 1, then press downward on the cover until it is seated. 9. Reinsert the 2 retaining screws that secure the cover to the tablet PC 2. Replacing the hard drive bay cover 10-12 Hardware Guide
-
 1
1 -
2
-
3
-
4
-
5
-
6
-
7
-
8
-
9
-
10
-
11
-
12
-
13
-
14
-
15
-
16
-
17
-
18
-
19
-
20
-
21
-
22
-
23
-
24
-
25
-
26
-
27
-
28
-
29
-
30
-
31
-
32
-
33
-
34
-
35
-
36
-
37
-
38
-
39
-
40
-
41
-
42
-
43
-
44
-
45
-
46
-
47
-
48
-
49
-
50
-
51
-
52
-
53
-
54
-
55
-
56
-
57
-
58
-
59
-
60
-
61
-
62
-
63
-
64
-
65
-
66
-
67
-
68
-
69
-
70
-
71
-
72
-
73
-
74
-
75
-
76
-
77
-
78
-
79
-
80
-
81
-
82
-
83
-
84
-
85
-
86
-
87
-
88
-
89
-
90
-
91
-
92
-
93
-
94
-
95
-
96
-
97
-
98
-
99
-
100
-
101
-
102
-
103
-
104
-
105
-
106
-
107
-
108
-
109
-
110
-
111
-
112
-
113
-
114
-
115
-
116
-
117
-
118
-
119
-
120
-
121
-
122
-
123
-
124
-
125
-
126
-
127
-
128
-
129
-
130
-
131
-
132
-
133
-
134
-
135
-
136
-
137
-
138
-
139
-
 140
140 -
 141
141 -
 142
142 -
 143
143 -
 144
144 -
 145
145 -
 146
146 -
 147
147 -
 148
148 -
 149
149 -
 150
150 -
151
-
152
-
153
-
154
-
155
-
156
-
157
-
158
-
159
-
160
-
161
-
162
-
163
-
164
-
165
 |
 |
10–12
Hardware Guide
Maintenance, Shipping and Travel
8. Align the tabs on the hard drive bay cover with the cover
slots on the tablet PC
1
, then press downward on the
cover until it is seated.
9. Reinsert the 2 retaining screws that secure the cover to the
tablet PC
2
.
Replacing the hard drive bay cover